Unusual car noises can be a sign of underlying issues with your vehicle. Ignoring these sounds can lead to more severe problems and costly repairs down the line.
Addressing these issues promptly through proper noise diagnosis is crucial. Fortunately, many common problems can be identified and fixed through DIY car repair, saving you time and money.
By understanding the causes of these noises and how to fix them, you can ensure your vehicle runs smoothly and safely.
Key Takeaways
- Identifying unusual car noises early can prevent major repairs.
- DIY car repair can be a cost-effective solution for many common issues.
- Proper noise diagnosis is key to fixing problems efficiently.
- Regular maintenance can help reduce the occurrence of unusual noises.
- Understanding the causes of car noises empowers you to take action.
Understanding 8 Common Noises Your Car Makes and How To Fix Them
Understanding the various noises your car makes is crucial for maintaining its health and preventing costly repairs. Cars can produce a variety of sounds, some of which can indicate potential problems. By learning to identify these noises, you can take proactive steps to address issues before they become major repairs.
Why Car Noises Shouldn’t Be Ignored
Car noises are often the first sign of a developing problem. Ignoring these sounds can lead to more severe issues, potentially causing safety hazards and expensive repairs. For instance, a squealing brake noise might indicate worn-out brake pads, while a grinding noise when shifting gears could signal transmission problems.
- Unusual noises can be early warnings of mechanical issues.
- Ignoring these signs can lead to more severe problems.
- Early diagnosis can save money and enhance safety.

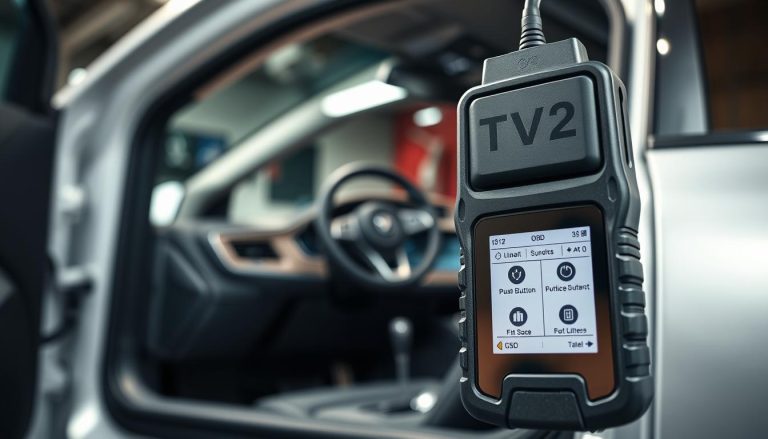
Essential Tools for DIY Diagnosis
Having the right tools is essential for diagnosing car problems effectively. Some of the basic tools you’ll need include a socket set, a multimeter, and a car manual. These tools will help you inspect various components and identify potential issues.
- A socket set for removing and inspecting parts.
- A multimeter for checking electrical systems.
- A car manual for guidance on specific models.
Safety Precautions Before You Start
Before starting any DIY diagnosis or repair, it’s crucial to take necessary safety precautions. Ensure you are in a well-ventilated area, and wear protective gear such as gloves and safety glasses. Additionally, make sure your car is securely positioned on a level surface and apply the parking brake.
- Work in a well-ventilated area to avoid inhaling fumes.
- Wear protective gear like gloves and safety glasses.
- Ensure your car is securely positioned and apply the parking brake.
Squealing Brakes: Causes and Solutions
The high-pitched sound of squealing brakes is not just annoying; it’s a warning sign that requires immediate action. Squealing brakes can be caused by a variety of factors, including worn-out brake pads, glazed rotors, or the presence of debris between the brake pads and rotors.
Why Brakes Make That High-Pitched Sound
Squealing noises from brakes are typically indicative of worn brake pads. When the brake pad material wears down to a certain level, the wear indicator on the pad comes into contact with the rotor, producing a high-pitched squeal. Other causes can include improper brake pad installation or the presence of contaminants on the brake components.

How to Inspect Brake Pads and Rotors
Inspecting your vehicle’s brake pads and rotors is a crucial step in diagnosing the cause of squealing brakes. This process involves both visual inspection and performance testing.
Visual Inspection Steps
- Remove the wheel to access the brake assembly.
- Inspect the brake pads for wear, looking for the wear indicator or measuring the pad thickness.
- Examine the rotors for signs of excessive wear, scoring, or glazing.
Testing Brake Performance
After visual inspection, test the brakes by driving at a moderate speed and then applying the brakes firmly. If the squealing persists or the vehicle pulls to one side, it may indicate uneven brake wear or other issues.
| Brake Component | Inspection Criteria | Action Required |
|---|---|---|
| Brake Pads | Wear indicator visible or pad thickness below minimum spec | Replace brake pads |
| Rotors | Excessive scoring, wear, or glazing | Resurface or replace rotors |
DIY Brake Pad Replacement vs. Professional Repair
Replacing brake pads can be a DIY-friendly task if you have the right tools and follow proper procedures. However, if you’re unsure or if the problem persists after replacement, it’s advisable to seek professional brake repair services. Professionals can diagnose underlying issues and ensure that your brakes are functioning safely and effectively.
Regular brake maintenance is key to preventing squealing brakes and ensuring vehicle safety. This includes regular inspections, timely replacement of worn components, and addressing any issues promptly.
Grinding When Shifting Gears
The grinding sound when shifting gears is not just annoying; it’s a warning sign that your transmission might be in trouble. Transmission grinding noises can be caused by various factors, ranging from simple issues like low transmission fluid levels to more complex problems requiring professional transmission repair.
Common Causes of Transmission Grinding
Understanding the causes of transmission grinding is crucial for effective diagnosis and repair. Common causes include:
- Worn or damaged transmission components
- Insufficient or dirty transmission fluid
- Misaligned or worn-out gear synchronizers
- Clogged transmission filters
How to Check and Replace Transmission Fluid
Checking and maintaining the correct level and quality of transmission fluid is vital for the longevity of your vehicle’s transmission. Here’s how to do it:
Fluid Level Inspection
To inspect the transmission fluid level, follow these steps:
- Ensure your vehicle is on a level surface.
- Check the owner’s manual for the location of the transmission dipstick.
- Pull out the dipstick, wipe it clean, and reinsert it to get an accurate reading.
- The level should be between the minimum and maximum marks.
Fluid Quality Assessment
Assessing the quality of the transmission fluid is just as important as checking its level. The fluid should be:
- A bright red color (though it darkens with age)
- Free of debris and particles
- Not burnt or smelling burnt
| Fluid Condition | Possible Cause | Recommended Action |
|---|---|---|
| Low Fluid Level | Leak or not enough fluid added | Check for leaks, top off fluid |
| Dirty or Contaminated Fluid | Fluid not changed regularly | Change transmission fluid |
| Burnt Smell | Overheating transmission | Check transmission cooler, consider professional repair |
When Grinding Indicates Serious Transmission Problems
If the grinding noise persists after checking and topping off the transmission fluid, it may indicate a more serious issue with your transmission. In such cases, a professional diagnosis is necessary to determine the extent of the problem and the required transmission repair.
Ignoring the grinding noise can lead to costly repairs down the line, including the possibility of needing a complete transmission replacement. Thus, it’s crucial to address the issue promptly.
Knocking Engine Sounds
The knocking sound emanating from your engine is not just annoying; it’s a warning sign of potential damage. Engine knocking, also known as pinging or pinking, can be caused by various factors, including fuel quality issues, improper engine timing, or worn-out engine components.
Diagnosing Different Types of Engine Knocks
Diagnosing the exact cause of engine knocking is crucial for effective repair. Different types of knocks can indicate different problems. For instance, a knocking sound that occurs when you accelerate might suggest an issue with fuel quality or engine combustion. On the other hand, a knock that happens during idling could indicate worn engine bearings or other internal engine problems.
Common Types of Engine Knocks:
- Pinging or pinking during acceleration
- Clunking or banging during idling
- Knocking that changes with engine speed
Addressing Fuel and Oil Quality Issues
Fuel and oil quality play significant roles in engine performance and knocking sounds. Using the wrong octane fuel or low-quality oil can lead to engine knocking.
Octane Rating and Engine Performance
The octane rating of fuel is crucial for preventing engine knocking. Higher octane fuel is more resistant to ignition, which can help prevent the premature combustion that causes knocking. However, using a higher octane than recommended by your vehicle’s manufacturer won’t provide additional benefits and can be a waste of money.
Oil Viscosity and Engine Protection
Engine oil viscosity affects engine performance and protection. The right viscosity ensures that engine components are properly lubricated, reducing wear and tear. Thicker oils might provide better lubrication but can reduce fuel efficiency. It’s essential to use the oil viscosity recommended by your vehicle’s manufacturer.
Key Considerations for Oil and Fuel:
| Factor | Impact on Engine | Recommendation |
|---|---|---|
| Octane Rating | Affects combustion and knocking | Use recommended octane level |
| Oil Viscosity | Influences lubrication and wear | Follow manufacturer’s viscosity recommendation |
| Fuel Quality | Impacts engine cleanliness and performance | Choose reputable fuel brands |
Preventing Serious Engine Damage
Preventing serious engine damage requires prompt attention to knocking sounds and regular maintenance. Regular oil changes, using the correct fuel, and addressing any engine issues promptly can help prevent costly repairs down the line.
Preventative Measures:
- Regular engine oil changes
- Monitoring fuel quality and octane rating
- Addressing engine knocks promptly
Whining Power Steering System
A whining power steering system can be a sign of underlying issues that need to be addressed promptly. The power steering system is vital for easy maneuverability of your vehicle, and any unusual noises should be investigated.
Identifying Power Steering Fluid Problems
One of the common causes of a whining power steering system is low or contaminated power steering fluid. To diagnose this issue, check the fluid level and condition. If the level is low, top it off with the recommended type of fluid. If the fluid is dirty or contaminated, consider flushing and replacing it. For more information on common car sounds and their causes, you can visit this resource.
Inspecting and Replacing the Power Steering Belt
The power steering belt, also known as the serpentine belt, plays a crucial role in the operation of the power steering system. Over time, it can wear out or become damaged, leading to whining noises.
Belt Tension Check
To check the belt tension, use a belt tension gauge. Compare the reading to the manufacturer’s specifications. If the tension is too low or too high, adjust it accordingly.
Belt Condition Assessment
Inspect the belt for signs of wear, such as cracks, frays, or excessive glazing. If you notice any of these issues, it’s time to replace the belt. Regular inspection can prevent unexpected failures.
Power Steering Pump Maintenance and Replacement
The power steering pump is another critical component that can cause whining if it’s failing or if there’s an issue with its mounting or the pulley. Regular maintenance, such as checking for leaks and ensuring proper mounting, can help prevent problems. If the pump is failing, it may need to be replaced.
By addressing these potential issues, you can resolve the whining noise and ensure your power steering system operates smoothly. Regular checks and maintenance are key to preventing more serious problems down the road.
Rattling Exhaust System
Rattling noises emanating from the exhaust system are not only annoying but can also be a sign of potential safety hazards. The exhaust system is responsible for directing harmful gases away from the vehicle, and any malfunction can lead to serious issues.
How to Locate Exhaust Leaks and Loose Components
To diagnose the cause of a rattling exhaust system, start by inspecting the exhaust components for any signs of damage or wear. Look for loose hangers, damaged mufflers, or cracked exhaust pipes. A visual inspection can often reveal the source of the problem.
Steps to Inspect:
- Check all exhaust hangers for looseness or damage.
- Inspect the muffler and exhaust pipes for any signs of rust or damage.
- Look for any disconnected or loose components.
Simple Fixes for Minor Exhaust Issues
For minor issues, such as loose hangers or small exhaust leaks, DIY repairs can be a cost-effective solution. Here are some simple fixes:
Tightening Loose Hangers
Loose hangers can cause the exhaust system to rattle. Tightening these hangers can often resolve the issue. Ensure that the hangers are securely fastened to prevent further rattling.
Patching Small Exhaust Leaks
Small leaks in the exhaust system can be patched using exhaust repair tape or sealant. However, it’s essential to note that these are temporary fixes, and a professional inspection is recommended for a permanent solution.
| Issue | DIY Fix | Professional Solution |
|---|---|---|
| Loose Hangers | Tighten hangers | Replace damaged hangers |
| Small Exhaust Leaks | Use exhaust repair tape or sealant | Weld or replace damaged sections |
When Exhaust Noise Indicates Safety Concerns
While some rattling noises can be addressed with DIY fixes, others may indicate more serious safety concerns. If you notice a significant increase in noise or if the rattling is accompanied by other symptoms like decreased performance or unusual smells, it’s crucial to have your vehicle inspected by a professional.
Ignoring these signs can lead to more severe problems, including safety hazards and costly repairs.
Clicking or Tapping When Turning
Noticing a clicking or tapping sound when turning your car? It’s time to investigate the cause, which could be related to your vehicle’s CV joints or steering components. Ignoring these noises can lead to more severe problems down the road.
Diagnosing CV Joint and Axle Problems
A clicking or tapping sound when turning is often associated with worn or damaged CV joints. To diagnose CV joint issues, inspect the boots for any signs of damage or wear. If the boots are torn, dirt and debris can enter the joint, causing the clicking noise.
- Check the CV joint boots for cracks or tears.
- Inspect the CV joints for any signs of wear or damage.
- Listen for clicking sounds when turning to confirm CV joint issues.
Inspecting Steering Components
Steering components, such as tie rod ends and ball joints, can also cause clicking or tapping noises when turning. Inspecting these components regularly can help identify potential problems before they become major issues.
Checking Tie Rod Ends
Tie rod ends play a crucial role in the steering system, connecting the steering rack to the wheels. To check tie rod ends, look for signs of wear or damage, such as loose or corroded connections.
- Inspect the tie rod ends for any signs of wear or damage.
- Check the connections for looseness or corrosion.
- Replace worn or damaged tie rod ends to prevent further damage.
Examining Ball Joints
Ball joints are another critical component of the steering system. To examine ball joints, check for any signs of wear or damage, such as looseness or corrosion.
- Inspect the ball joints for any signs of wear or damage.
- Check for looseness or corrosion in the ball joint connections.
- Replace worn or damaged ball joints to maintain steering system integrity.
Preventative Maintenance for Steering Systems
Regular maintenance is key to preventing steering system problems. By inspecting steering components regularly and addressing any issues promptly, you can help ensure your vehicle’s steering system operates smoothly and safely.
Key preventative maintenance tasks include:
- Regularly inspecting CV joints and boots.
- Checking tie rod ends and ball joints for wear or damage.
- Maintaining proper steering system fluid levels.
By following these tips and staying on top of steering system maintenance, you can help prevent clicking or tapping noises when turning and ensure your vehicle remains safe and reliable.
Humming or Roaring from Tires and Wheels
Humming or roaring noises from your tires and wheels are not just annoying; they can indicate potential problems with your vehicle. These sounds often signal issues that, if left unaddressed, could lead to more significant problems, affecting your vehicle’s performance and safety.
How to Read Tire Wear Patterns
Understanding tire wear patterns is crucial in diagnosing issues related to humming or roaring noises. Uneven tire wear can cause vibrations that result in these noises. To read tire wear patterns, inspect your tires regularly for signs of uneven wear, such as feathering, cupping, or bald spots.
- Feathering: Indicates misaligned wheels or improper tire inflation.
- Cupping: Often a sign of worn-out shock absorbers or improper tire balancing.
- Bald Spots: Can result from lack of rotation or misaligned wheels.
Diagnosing and Replacing Wheel Bearings
Wheel bearings play a critical role in your vehicle’s operation, and their failure can lead to humming or roaring noises. Diagnosing wheel bearing issues involves listening for changes in the noise level when turning or applying brakes.
Testing for Bearing Failure
To test for wheel bearing failure, follow these steps:
- Jack up the vehicle and remove the wheel.
- Spin the hub by hand; it should rotate smoothly and quietly.
- Grasp the hub and attempt to move it back and forth; any play indicates worn-out bearings.
Wheel Bearing Replacement Basics
Replacing wheel bearings requires specialized tools and knowledge. It’s essential to refer to your vehicle’s repair manual for specific instructions. Generally, the process involves removing the wheel hub assembly, pressing out the old bearing, and installing a new one.
| Step | Description |
|---|---|
| 1 | Remove the wheel and brake caliper. |
| 2 | Take out the wheel hub assembly. |
| 3 | Press out the old bearing and clean the hub. |
| 4 | Install the new bearing and reassemble. |
Proper Tire Maintenance and Rotation Schedule
Maintaining your tires properly is vital for preventing uneven wear and associated noises. Regular tire rotation, checking tire pressure, and ensuring proper wheel alignment are key practices. Refer to your vehicle’s manual for the recommended tire rotation schedule.
Regular tire maintenance not only enhances your vehicle’s performance but also improves safety on the road.
Conclusion
Addressing common car noises is crucial for maintaining your vehicle’s health and preventing costly repairs. By understanding the causes of squealing brakes, grinding transmission, knocking engine sounds, and other issues, you can take proactive steps to diagnose and fix problems.
A car repair summary is essential for car owners to identify potential issues before they become major problems. With DIY automotive tips, you can inspect and replace brake pads, check transmission fluid, and perform other maintenance tasks to keep your vehicle running smoothly.
By applying the knowledge gained from this article, you can take control of your car’s maintenance and repairs, ensuring a safer and more enjoyable driving experience. Regular checks and timely interventions will help extend the lifespan of your vehicle and prevent unexpected breakdowns.