If you’re considering tinting your car windows, you’ve likely wondered whether window tint goes on the inside or outside of the glass. This common question confuses many first-time DIYers and can make the difference between a professional-looking finish and a disappointing result. Understanding the correct application method is crucial for durability, effectiveness, and appearance of your window tint.
In this comprehensive guide, we’ll clear up this confusion once and for all, explain why proper application matters, and walk you through the entire window tint application process. Whether you’re planning to tint your car windows yourself or just want to understand how it works, this article will provide all the information you need.
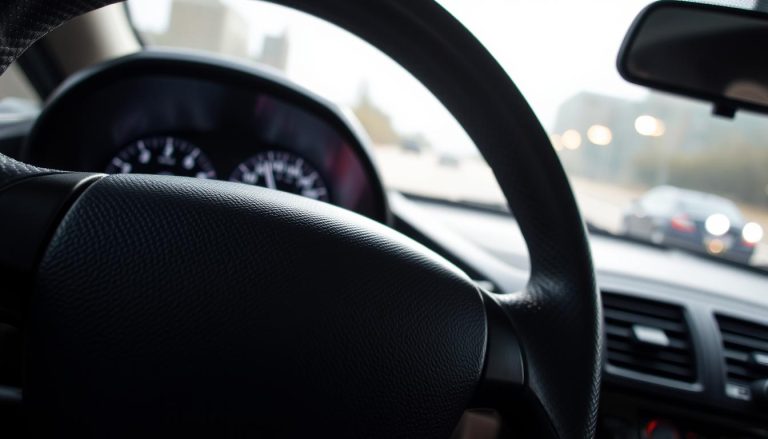
Window Tint Goes on the Inside: Here’s Why
The definitive answer is that window tint is applied to the interior side of the glass, not the exterior. This isn’t just a preference but a necessity for several important reasons. Understanding why tint goes on the inside will help you appreciate the science behind window tinting and ensure you get the best results.
Why Window Tint Must Be Applied to the Interior
- The adhesive layer of window tint film is designed specifically to bond with the interior glass surface
- Interior application protects the film from external elements like road debris, weather, and physical damage
- The window itself acts as a shield for the tint film, extending its lifespan significantly
- Proper heat rejection and UV blocking properties function optimally when the film is applied to the interior
- Window tint films are engineered with layers that must face specific directions to work correctly
Professional installers always apply window tint to the inside of windows because the film’s structure is designed with this application method in mind. The multi-layer construction of quality window tint includes an adhesive layer, a dye or metal layer, and a protective coating—all engineered to work when applied to the interior glass surface.
Interior vs. Exterior Application: A Comparison
Interior Application Benefits
- Protected from environmental damage (rain, debris, etc.)
- Significantly longer lifespan (5-10+ years)
- Better adhesion due to cleaner surface
- Protected from windshield wipers and cleaning
- Optimal performance of UV and heat rejection
- Less susceptible to peeling and bubbling
Exterior Application Drawbacks
- Constant exposure to weather elements
- Significantly shorter lifespan (1-3 years)
- Vulnerable to road debris and damage
- Affected by windshield wipers and car washes
- Reduced effectiveness of UV and heat protection
- Higher likelihood of peeling, scratching, and fading
While there are some specialty exterior films available for specific purposes (like clear protective films), standard window tint is not designed for exterior application. Applying regular window tint to the outside of your windows would result in rapid deterioration, poor performance, and wasted time and money.
Special Cases: When Exterior Films Are Used
While standard window tint goes on the interior, there are specialized films designed specifically for exterior application. It’s important to understand these exceptions to avoid confusion:
Paint Protection Films (PPF)
Clear films applied to the exterior of a vehicle to protect the paint from chips, scratches, and road debris. These are not tint films and don’t darken windows.
Weatherproof Exterior Films
Specialty films designed for building windows that cannot be accessed from the interior. These are rare in automotive applications.
Temporary Sun Shades
Removable mesh or static cling products that temporarily block sun. These aren’t permanent tints and don’t offer the same benefits.
Unless you’re working with one of these specialty products, all standard window tinting films are designed exclusively for interior application. If someone suggests applying regular tint to the exterior of your windows, they’re likely misinformed about proper installation techniques.
The Proper Window Tint Application Process
Understanding the correct window tint application process will help you appreciate why interior application is essential. Here’s a simplified overview of how professional window tinting is performed:

- Thorough cleaning of the interior window surface – Removing all dust, dirt, and residue is critical for proper adhesion
- Preparing the tint film – Measuring and cutting the film to fit the window with extra margin for trimming
- Spraying the window with soapy water – This allows the film to slide into position before adhering
- Removing the liner from the adhesive side – Exposing the sticky side that will adhere to the glass
- Applying the film to the interior glass surface – Positioning it carefully while it’s still movable
- Squeegeeing out water and air bubbles – Working from the center outward to ensure smooth adhesion
- Trimming excess film – Cutting precisely around edges for a perfect fit
- Heat shrinking (for curved windows) – Using a heat gun to conform the film to curved surfaces
- Final squeegee and inspection – Ensuring no bubbles or imperfections remain
Essential Tools for Window Tint Application
Proper window tint application requires specific tools to ensure a professional result. If you’re considering a DIY approach, you’ll need to gather these essential items:
Basic Tools
- Quality window tint film (pre-cut or roll)
- Spray bottle filled with soapy water solution
- Squeegee or hard card for removing bubbles
- Precision cutting knife or razor blade
- Lint-free microfiber cloths
- Heat gun (for curved windows)
Cleaning Supplies
- Ammonia-free glass cleaner
- Dish soap (for soapy water solution)
- Scraper for removing old tint or adhesive
- Isopropyl alcohol for final cleaning
- Lint roller to remove dust particles
- Clean workspace with minimal dust

Having the right tools is essential, but equally important is using high-quality window tint film. Inferior products often result in bubbling, peeling, or fading, regardless of how well they’re installed.
Common Window Tint Application Mistakes to Avoid
Even with the right tools and materials, window tint application can go wrong if you make these common mistakes:
| Mistake | Consequence | How to Avoid |
| Applying tint to the exterior | Rapid deterioration, peeling, and damage | Always apply to the interior surface only |
| Insufficient cleaning | Bubbles, poor adhesion, and trapped debris | Clean thoroughly and work in a dust-free environment |
| Using too little soapy water | Film sticks too quickly, making positioning difficult | Be generous with soapy water application |
| Improper squeegee technique | Trapped bubbles and water pockets | Work from center outward with firm, even pressure |
| Cutting film on the glass | Scratched glass that’s visible after installation | Use proper measuring and pre-cutting techniques |
| Touching adhesive side | Fingerprints and oils that prevent proper adhesion | Handle film by edges and keep hands wet with soapy water |
Professional Tip: Window tinting is a skill that takes practice to master. If you’re not confident in your abilities, consider having your windows professionally tinted. The cost of professional installation is often less than the combined expense of materials, tools, and potential mistakes that require redoing the job.
Maintaining Interior-Applied Window Tint
Properly applied interior window tint can last for many years with the right care. Follow these maintenance tips to extend the life of your window tint:

Proper cleaning technique for maintaining window tint
Immediate Post-Installation Care
- Wait 2-4 days before rolling down windows after installation
- Avoid washing or cleaning the windows for at least one week
- Be patient with any small water bubbles as they typically disappear as the tint cures
- Keep windows closed during the curing process, especially in humid conditions
Long-Term Maintenance
- Use only ammonia-free cleaners (ammonia damages window tint)
- Clean with soft microfiber cloths to avoid scratching
- Avoid abrasive materials or rough scrubbing
- Clean tinted windows less frequently than untinted ones
- Address any edge peeling promptly to prevent further deterioration
With proper care, quality window tint applied to the interior of your windows can last 5-10 years or more, providing continued UV protection, heat rejection, and privacy throughout its lifespan.
Frequently Asked Questions About Window Tint Application
Can any type of window tint be applied to the exterior?
Standard window tint films are not designed for exterior application. There are specialty exterior films like paint protection films (PPF) and some building window films, but these serve different purposes than traditional window tint and are specifically engineered for exterior use.
How long does window tint application take?
Professional window tint application typically takes 1-3 hours for a complete vehicle, depending on the number and size of windows. DIY installation usually takes considerably longer, especially for first-time installers who may need 4-8 hours to complete the job properly.
Can I roll down my windows immediately after tint installation?
No, you should keep windows rolled up for 2-4 days after installation to allow the adhesive to cure properly. Rolling windows down too soon can cause the film to peel or shift before it’s fully bonded to the glass.
How do I know if my window tint was applied correctly?
Properly applied window tint should have no large bubbles, creases, or debris trapped underneath. The edges should be cleanly cut and tucked under the window seals where appropriate. Small water bubbles are normal immediately after installation and should disappear as the tint cures.
Is it legal to tint my own car windows?
DIY window tinting is legal in most areas, but the darkness (VLT percentage) and which windows can be tinted are regulated by state and local laws. Always check your local regulations before purchasing window tint to ensure compliance with legal requirements.
Conclusion: Interior Application is the Standard for Window Tint
To definitively answer the question posed in the title: window tint goes on the inside of the glass, not the outside. This interior application method protects the film from environmental damage, ensures proper adhesion, and allows the window tint to perform its UV-blocking and heat-rejection functions effectively.
While window tinting can be a DIY project, it requires patience, the right tools, and attention to detail. Many car owners find that professional installation provides the best results and longest-lasting finish. Whether you choose to tackle the project yourself or hire a professional, understanding that window tint belongs on the interior of the glass is the first step toward achieving the perfect tinted window look.