This introduction explains the correct service path for a reliable air conditioning system. Recover any refrigerant from the system, evacuate the circuit for at least one hour, and then recharge by weight into a solid vacuum. This method protects the compressor and restores factory performance.
Do not top up using a single gauge or a canned quick-fix. That guesswork risks undercharge or overfill and can mimic poor cooling or cause costly damage.
Check the under-hood decal for the exact refrigerant type and net capacity before you begin. Some engines specify 16 ounces of R-134a and 5.5 fluid ounces of PAG-46, but the label on your car is the final authority.
Know the limits of DIY work and follow legal rules for refrigerant handling. When leaks, repeat posts about warm vents, or compressor issues appear, defer to certified service for proper recovery and sealed-system repair.
Key Takeaways
- Always recover, evacuate, then recharge by weight for stable summer performance.
- Use the under-hood label for exact refrigerant type and capacity.
- Single-gauge topping up is risky and often leads to repeat problems.
- Small overfills can mimic underperformance; precise weight matters.
- Follow safety and legal rules; get certified help for leaks or compressor issues.
Before You Recharge: Understanding Your Honda Civic’s A/C System and User Intent
Start by confirming which refrigerant and capacity your vehicle was built for; that sticker is the source of truth. This step sets the goal of restoring spec cooling rather than guessing at a quick fix.
Common signs your Civic needs attention
Warm air, short cycling, or slow cool-down are clear performance signals. Each can stem from low charge, airflow restriction, or control faults.
Don’t assume a single symptom means the same repair every time; check both refrigerant and mechanical airflow before acting.
Recharge versus repair
The A/C is a sealed system; a need for added gas usually signals a leak. Adding refrigerant without finding the leak risks repeating symptoms and harming components.
Refrigerant types and why the decal rules
Models from different years use R-134a or R-1234yf and they run at different pressures. Honda’s under-hood sticker lists the exact refrigerant and weight—follow that rather than relying on pressures or a generic quote.
- Diagnose first: treat leaks, airflow, and controls before topping up.
- Charge by weight: it beats pressure-only methods for consistent results.
- Learn from replies and posts: many threads underscore leak checks and decal specs as best practice.
Prep, Safety, and Tools: What You Need to Recharge Correctly
Begin with certified equipment and correct consumables. Assemble a recovery/evacuation machine, a calibrated scale, quality manifold gauges, the specified refrigerant, and the correct PAG oil for your Honda Civic system.
Essential tools and parts
Source consumables from a reputable auto parts store and verify labels. Generic kits or mismatched oil can reduce efficiency and harm components.
Safety and legal musts
Recover, don’t vent. EPA and state rules require proper recovery. Wear gloves and eye protection, work in a ventilated area, and stop if equipment won’t hold a vacuum.
- Use a scale and charge by weight; pressures or a single gauge are guesswork.
- Manifold gauges monitor high and low side but do not replace a scale.
- Keep fittings clean, cap open lines, and document quantities removed and added.
If you lack a certified machine, schedule a shop visit for recovery, then return to finish the service or request a professional air conditioning recharge guide. Read replies and posts for real-world tips, but rely on spec labels and equipment for a proper job.
How to Recharge Honda Civic AC
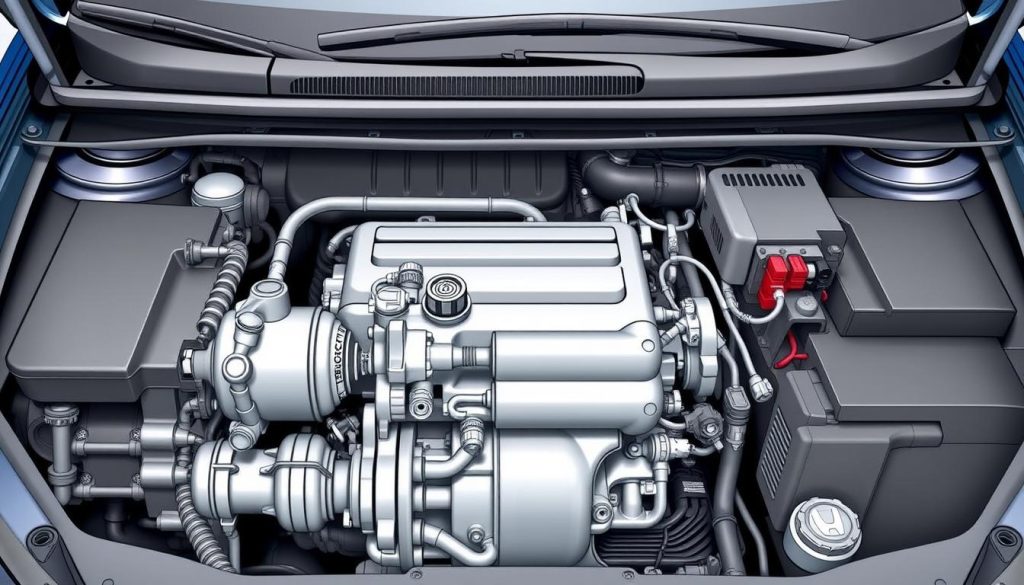
Locate the under-hood sticker and note the specified refrigerant, net weight, and oil requirement before any service. Follow that decal as the final authority; example figures like 16 ounces R-134a and 5.5 ounces PAG-46 are only examples.
Recover and inspect
Connect a certified recovery machine and remove remaining refrigerant safely. If the circuit holds no gas, investigate for a gross leak rather than adding freon and masking a larger issue.
Evacuate and hold vacuum
Attach manifold gauges and pull a deep vacuum. Hold for at least one hour and verify the vacuum remains steady; loss indicates a leak that needs repair.
Charge by weight and finish checks
Place the refrigerant cylinder on a calibrated scale and add the exact weight into the held vacuum. Do not tune by pressures or a single gauge; ambient conditions mislead.
- Add oil only when replaced parts require it.
- Verify compressor engagement, condenser fan, vent temps, and line frost patterns.
- Road-test and record exact ounces added and any parts changed for future reply or warranty posts.
Troubleshooting, Pressure Myths, and Avoiding Costly Mistakes
When vents aren’t blowing cold, a clear method helps tell charge problems from mechanical faults. Treat the system as sealed: needing gas usually means a leak that must be fixed before adding refrigerant.
Undercharge vs. overcharge: similar symptoms and how to tell
Both low and excess charge can cause warm air, short cycling, or poor airflow. The reliable fix is restoring the exact mass specified on the under‑hood label rather than chasing pressures.
Pressure charts are second best
Ambient temp, humidity, and fan speed skew pressure readings. Honda specifies refrigerant capacity by weight because that creates predictable system behavior across varying conditions.
Don’t tune by vent temperature alone
A thermometer-only check is a rough indicator. Cabin load, vehicle speed, and heater bleed all change vent numbers and can mislead DIY diagnostics.
When to stop and see a shop
If the system won’t hold a vacuum, you find persistent leak signs, or charges drop repeatedly over weeks, stop and get professional help. Compressor or condenser faults can mimic charge issues and may be covered by OEM programs for certain years.
- Use leak detection (UV dye, nitrogen, or electronic detector) before adding refrigerant.
- Check condenser airflow and compressor operation when the system won’t stabilize.
- Keep records: ounces added, repairs, quotes, and any shop reply or thread that informed the work.
Conclusion
Follow the vehicle’s sticker and measured charge to turn uneven vents into reliable, blowing cold performance. The gold standard is simple: recover existing refrigerant, hold a deep vacuum for the proper time, then recharge by weight with the exact refrigerant and oil shown on the under-hood page. This protects the compressor and condenser and keeps the air conditioning working through summer.
Skip consumer kits and single-gauge guesswork; source correct parts from a trusted auto parts store and use a calibrated scale or a certified recovery machine if needed. If freon loss repeats, stop adding gas and find the leak. Document ounces added, parts changed, and any reply or thread that informed your quote so future service or warranty work is clear.
FAQ
What are common signs my Civic’s air conditioning needs attention?
Warm air from vents, weak cooling, long run times with little temperature drop, and short cycling are typical indicators. Also watch for unusual noises from the compressor, oil residue around fittings, or a sudden drop in cabin comfort during summer driving. These point to low refrigerant, airflow restriction, or component wear.
If the system feels warm, should I add refrigerant or seek repairs?
Low refrigerant usually means a leak in the sealed system. Adding refrigerant without locating the leak is a temporary fix and can mask a failing component. Have the system tested for leaks and repaired before refilling to protect the compressor and avoid repeated service visits.
Which refrigerant does my Civic use and how do I confirm it?
Models built before roughly 2015 commonly use R‑134a; newer models shifted to R‑1234yf. Confirm the correct type and charge weight on the under‑hood decal or in the owner’s manual. Using the wrong refrigerant risks poor cooling and damage to seals and the compressor.
What tools and parts are essential for a proper service?
A true refrigerant recovery/evacuation machine, vacuum pump, manifold gauges, refrigerant scale, correct refrigerant, and appropriate PAG oil are essential. A UV dye kit helps locate leaks. Single‑can quick kits lack accuracy and risk overcharging.
Are there legal or safety rules I must follow when servicing the system?
Yes. EPA rules prohibit venting refrigerant; always recover and recycle. Wear gloves and safety glasses and work in a ventilated area. Some states require certified technicians for handling refrigerants. Dispose of used oil and components per local regulations.
Why is charging by weight preferred over pressure or can‑based methods?
Weight ensures the correct mass of refrigerant is in the system regardless of ambient temperature or running condition. Pressure readings vary with temperature and can mislead. A scale provides repeatable, manufacturer‑specified accuracy and avoids overcharge or undercharge.
When must PAG oil be added or replaced?
Add or replenish PAG oil only if you replace A/C components like the compressor, condenser, or evaporator. Follow the service manual for exact amounts and oil type (commonly PAG‑46). Excess oil reduces cooling efficiency; too little risks compressor failure.
How should I verify the system after charging?
Confirm compressor clutch engagement, adequate condenser fan operation, and steady outlet vent temps. Check suction and discharge hoses for expected temperature differences and watch for frost patterns on the lines. Use gauges to confirm pressures align with expected operating ranges for the ambient temperature.
How can I tell undercharge from overcharge if both can blow warm air?
Undercharge often shows low suction pressure, a warm evaporator, and the compressor may cycle frequently. Overcharge produces high discharge pressure, elevated compressor temps, and sometimes liquid slugging. Proper diagnosis uses gauges, temperature readings, and weight measurements rather than vent temperature alone.
Are pressure charts reliable for charging my Civic’s system?
Pressure charts offer guidance but are secondary. Honda specifies charge by weight and oil type for accuracy. Ambient temperature and system load change pressures, so rely on weight and functional checks rather than fixed pressure targets.
Is a DIY quick‑charge kit a good option for fast cooling restoration?
No. Quick kits often use pressure methods and lack recovery capability. They risk overcharging, misidentifying leaks, and violating regulations. For a lasting, legal repair, use proper equipment or visit a certified shop.
When should I stop DIY work and take the car to a professional shop?
Stop and consult a shop if you detect persistent leaks, repeated low charge after service, compressor noise, visible oil on components, or if the repair involves refrigerant recovery and machine use you don’t own. Also seek a shop for warranty work or if R‑1234yf service is required and you lack certification.
What are quick signs of a major leak or compressor failure?
Strong refrigerant smell, visible oil streaks, rapid loss of cooling after a refill, grinding or rattling from the compressor, or high system pressures on the discharge side indicate a significant fault. These need immediate professional diagnosis to avoid further engine or A/C damage.
