Customizing your Tesla is a great way to personalize your vehicle and give it a unique touch. One popular modification is removing the Tesla emblem, a process that requires care and attention to detail to avoid damaging the vehicle’s paint or surfaces.
Removing the emblem can be a straightforward process if done correctly. It’s essential to follow a DIY Tesla customization guide that outlines the necessary steps and precautions. This ensures that the removal process is safe and effective, preserving the integrity of your vehicle’s appearance.
Key Takeaways
- Careful removal is crucial to avoid damaging the vehicle’s paint or surfaces.
- A Tesla emblem removal guide is essential for a successful DIY project.
- Personalizing your Tesla can enhance its appearance and uniqueness.
- Following a DIY Tesla customization guide can help ensure a safe and effective removal process.
- Attention to detail is key when removing the emblem.
Why Remove Your Tesla Emblem?
For many Tesla enthusiasts, removing the emblem is a simple yet effective way to enhance their vehicle’s visual appeal. Whether it’s for aesthetic customization or to prepare for repainting or wrapping, the decision to remove the emblem can significantly impact the car’s overall look.
Aesthetic Customization Options
Removing the Tesla emblem can be a crucial step in achieving a more personalized and sleek design. Many owners opt for a “badge-less” look, which can make the vehicle appear more streamlined and modern. This aesthetic choice is particularly popular among those who value minimalism and want their Tesla to stand out from the standard models on the road.
Aesthetic customization through emblem removal allows owners to tailor their vehicle’s appearance to their personal taste. Some may choose to replace the emblem with a custom design or badge, further personalizing their Tesla. The process involves not just removing the emblem but also ensuring that the area is properly cleaned and prepared for any subsequent modifications.
Preparing for Repainting or Wrapping
Another significant reason for removing Tesla emblems is to prepare the vehicle for repainting or wrapping. The emblems can create uneven surfaces and may leave adhesive residue, which can complicate the repainting or wrapping process. By removing the emblems, owners can ensure a smoother, more even finish.
When preparing for a new paint job or wrap, it’s essential to consider the condition of the underlying surface. Removing the emblems allows for a thorough inspection and any necessary repairs, ensuring that the new paint or wrap adheres properly and looks its best.
| Reason for Emblem Removal | Benefits |
|---|---|
| Aesthetic Customization | Personalized look, modern appearance, potential for custom badge installation |
| Preparing for Repainting or Wrapping | Smoother finish, easier application, better adhesion of new paint or wrap |
Tools and Materials You’ll Need
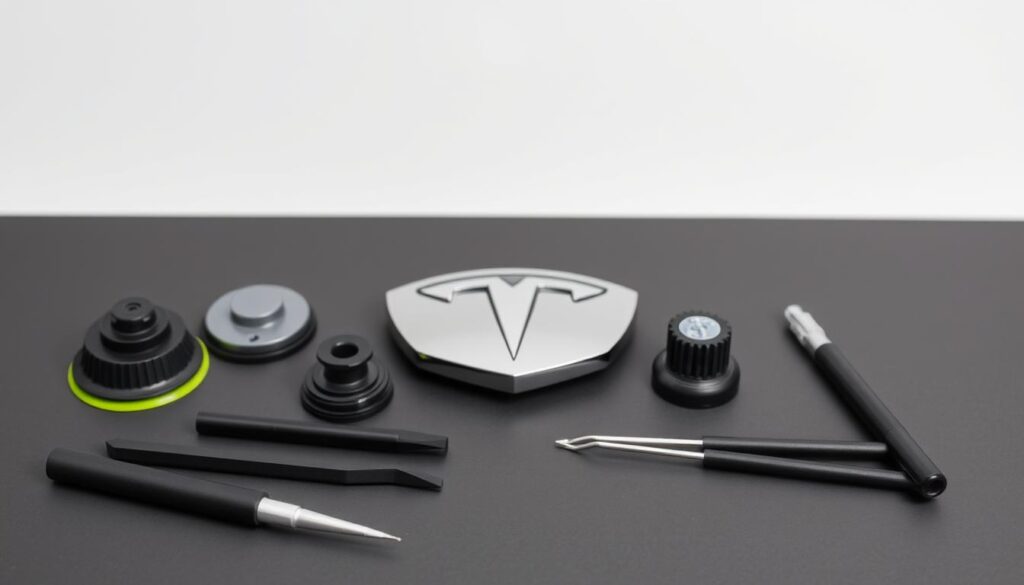
To remove your Tesla emblem safely and effectively, you’ll need to assemble a few essential tools and materials. The right equipment will help prevent damage to your vehicle’s paint and ensure a clean removal process.
Essential Tools for Safe Removal
The following tools are crucial for safely removing Tesla emblems:
- Plastic Pry Tools: These are designed to pry off emblems without scratching the paint.
- Heat Gun or Hair Dryer: Heating the adhesive makes the removal process easier.
- Dental Floss or Fishing Line: Useful for cutting through the adhesive behind the emblem.
| Tool | Purpose |
|---|---|
| Plastic Pry Tools | Safe removal of emblems without paint damage |
| Heat Gun or Hair Dryer | Softens adhesive for easier removal |
| Dental Floss or Fishing Line | Cuts through adhesive behind the emblem |
Optional but Helpful Equipment
While not necessary, the following tools can make the emblem removal process smoother:
- Adhesive Remover: Helps in removing any residual adhesive.
- Microfiber Cloth: Useful for cleaning the area after removal.
- Trim Removal Tool: Can be used for more stubborn emblems or trim pieces.

Having the right tools and materials on hand is crucial for a successful DIY Tesla emblem removal. By using the appropriate equipment, you can ensure a safe and effective process.
Preparation Before Removal
Before you start removing your Tesla emblem, it’s crucial to prepare the area properly. This step is often overlooked but is essential for a safe and successful removal process. Proper preparation helps prevent damage to the surrounding paint and surfaces.
Cleaning the Emblem Area
Start by cleaning the emblem area thoroughly. Use a mild soap and water solution to remove any dirt or debris that may be accumulated around the emblem. This ensures that the area is free from contaminants that could interfere with the removal process or damage the paint.
Drying the area completely after cleaning is also important to prevent any water spots from forming. Use a microfiber cloth to dry the area gently.
Temperature Considerations for Adhesive
The temperature of the adhesive can significantly affect its strength and ease of removal. Warm the emblem area gently using a hair dryer or by parking your Tesla in a warm, sunny spot. This helps to loosen the adhesive, making the removal process easier and reducing the risk of damaging the paint.

Protecting Surrounding Paint and Surfaces
To protect the surrounding paint and surfaces, apply a layer of masking tape or painter’s tape around the emblem. This creates a barrier that prevents accidental scratches or damage during the removal process. Ensure the tape is applied carefully to avoid touching the emblem itself.
Safety Precautions to Take
When removing your Tesla emblem, it’s essential to take safety precautions to avoid injury. Wear protective gloves to prevent cuts from sharp edges, and safety glasses to protect your eyes from debris. Work in a well-ventilated area to avoid inhaling any fumes from adhesives or cleaning products.
By following these preparation steps, you can ensure a safe and successful Tesla emblem removal process.
How to Remove Tesla Emblem: Step-by-Step Guide for DIY Enthusiasts
For those looking to personalize their Tesla, removing the emblem is a popular modification. This guide will walk you through the process, ensuring a safe and effective removal.
Model-Specific Considerations (Model 3, S, X, Y)
Different Tesla models may have slightly varying emblem attachment methods. For instance, the Model 3 and Model Y have similar front emblem designs, while the Model S and Model X have larger emblems with potentially stronger adhesives.
Before starting, it’s essential to understand the specific considerations for your Tesla model to avoid damaging the surrounding paint or surfaces.
| Tesla Model | Emblem Size | Adhesive Strength |
|---|---|---|
| Model 3 | Medium | Moderate |
| Model S | Large | Strong |
| Model X | Large | Strong |
| Model Y | Medium | Moderate |
Heating the Adhesive Properly
Heating the adhesive is a crucial step in the removal process. Using a hair dryer or heat gun, gently warm the emblem to loosen the adhesive.
Caution: Avoid overheating, as this can damage the paint or surrounding components.
Using Dental Floss or Fishing Line Technique
The dental floss or fishing line technique is a popular method for removing Tesla emblems without damaging the paint.
Carefully thread the floss or line behind the emblem and gently saw back and forth while pulling outward.
Working with Plastic Pry Tools
Plastic pry tools can be used to assist in the removal process, especially if the emblem is stubborn.
Tip: Use caution to avoid scratching the surrounding surfaces.
Removing Residual Adhesive Completely
After removing the emblem, there may be residual adhesive left on the surface.
Use a gentle adhesive remover or rubbing alcohol to clean the area thoroughly.
By following these steps and considering the specific needs of your Tesla model, you can successfully remove the emblem and achieve your desired customization.
After Removal: Finishing Touches
Once you’ve successfully removed your Tesla emblem, it’s time to focus on the finishing touches. This crucial step ensures that your vehicle looks its best, whether you’re planning to install custom emblems or simply maintain its original appearance.
Cleaning and Polishing the Area
After removing the emblem, the area may be left with adhesive residue or minor scratches. To restore it to its original condition, start by cleaning the area thoroughly with a mild soap and water solution. For tougher adhesive residue, consider using a specialized adhesive remover. Once clean, polish the area with a high-quality car polish to remove any minor scratches and restore the shine.
- Use a microfiber cloth to avoid scratching the surface.
- Apply polish in circular motions for even coverage.
- Buff the area with a clean microfiber cloth to remove excess polish.
Installing Custom Emblems or Badges
If you’re looking to personalize your Tesla, installing custom emblems or badges is a great way to do so. Ensure that the new emblems are compatible with your Tesla model and follow the manufacturer’s instructions for installation. Use a level to ensure proper alignment, and apply gentle pressure to avoid air bubbles under the adhesive.
- Clean the area where the new emblem will be applied.
- Align the emblem carefully, using a level if necessary.
- Apply the emblem slowly, starting from the center and moving outward to avoid air bubbles.
Preserving Removed Emblems for Future Use
If you plan to reinstall the original emblem in the future or keep it as a spare, it’s essential to preserve it properly. Clean the emblem gently to remove any dirt or adhesive residue. Store it in a protective case or bag to prevent damage.
- Keep the emblem away from direct sunlight to prevent fading.
- Store it in a dry place to avoid moisture damage.
- Consider wrapping the emblem in a soft cloth for extra protection.
Conclusion
Removing the Tesla emblem can be a straightforward process if done correctly. By following the steps outlined in this guide, DIY enthusiasts can successfully remove their Tesla emblem, achieving a sleek and customized look.
A successful Tesla emblem removal summary involves careful preparation, the right tools, and a patient approach. This guide has provided a step-by-step walkthrough, ensuring that readers can confidently undertake this DIY Tesla customization project.
With the emblem removed, Tesla owners can explore various customization options, such as repainting, wrapping, or installing custom badges. This DIY project not only enhances the vehicle’s appearance but also provides an opportunity for owners to personalize their Tesla.
In conclusion, removing the Tesla emblem is a feasible DIY project that can lead to a unique and personalized vehicle appearance, marking a satisfying DIY Tesla customization conclusion.
FAQ
What are the benefits of removing Tesla emblems?
Removing Tesla emblems can enhance the vehicle’s appearance, provide a more personalized look, and prepare the surface for repainting or wrapping.
What tools are required to remove Tesla emblems?
Essential tools include plastic pry tools and heating devices, while optional equipment like dental floss or fishing line can also be helpful.
How do I prepare my Tesla for emblem removal?
Clean the area around the emblem, consider the temperature to loosen the adhesive, protect surrounding paint and surfaces, and take necessary safety precautions.
Can I remove Tesla emblems on my own, or do I need professional help?
With the right tools and preparation, DIY enthusiasts can safely remove Tesla emblems, but it’s recommended to follow a step-by-step guide and take necessary precautions.
Are there any model-specific considerations for removing Tesla emblems?
Yes, different Tesla models, such as Model 3, S, X, and Y, may have varying emblem removal procedures, so it’s essential to consider the specific model’s requirements.
How do I remove residual adhesive after taking off the Tesla emblem?
Use a suitable adhesive remover or cleaning solution to completely remove any remaining adhesive residue.
Can I reuse or preserve the removed Tesla emblems?
Yes, you can preserve the removed emblems for future use by storing them properly, and you can also consider installing custom emblems or badges.
What are the necessary steps after removing the Tesla emblem?
Clean and polish the area, and consider installing custom emblems or badges to complete the desired look.


