A malfunctioning brake rotor poses a significant risk to vehicular safety. Brake rotor problems manifest as vibrations or squealing during braking, signaling an impending issue.
It is imperative to recognize the signs of worn-out rotors to ensure vehicular safety and performance. Neglecting these indicators can escalate into more severe damage and substantial repair costs.
By grasping the primary indicators of a defective rotor, one can proactively mitigate potential issues. This article delves into the 8 unmistakable signs that suggest a rotor’s malfunction.
Key Takeaways
- Identify the common symptoms of a bad brake rotor
- Understand the importance of regular brake maintenance
- Recognize the signs of worn-out rotors
- Learn how to address brake rotor problems
- Discover the benefits of proactive brake care
What Are Brake Rotors and Why They Matter
Brake rotors are indispensable for a vehicle’s capacity to decelerate safely and effectively. They are integral to the braking apparatus, collaborating with brake pads and calipers to decelerate or halt the vehicle.
The Function of Rotors in Your Braking System
The primary role of brake rotors is to offer a surface for the brake pads to engage with upon brake application. This engagement generates friction, which imparts deceleration to the vehicle. Brake rotors are engineered to endure high temperatures and stresses, rendering them a critical component in vehicular safety.
How Rotors Work with Brake Pads and Calipers
The synergy between brake rotors, pads, and calipers is pivotal to the braking mechanism. Upon activation of the brake pedal, the caliper compresses the brake pads onto the rotor, engendering friction to decelerate the vehicle. Optimal alignment and condition of these components are imperative for efficacious braking.
Types of Rotors and Their Differences
Brake rotors come in various forms, including solid rotors, ventilated rotors, and drilled or slotted rotors. Each variant offers distinct benefits and is tailored for specific driving conditions and vehicle configurations.
| Type of Rotor | Description | Advantages |
|---|---|---|
| Solid Rotors | A single, solid piece of metal | Cost-effective, simple design |
| Ventilated Rotors | Rotors with vanes or passages for cooling | Improved heat dissipation, better for heavy-duty use |
| Drilled or Slotted Rotors | Rotors with drilled holes or machined slots | Enhanced braking performance, improved heat dissipation |

Sign #1: Squealing or Squeaking Noises
Squealing or squeaking noises emanating from the brakes signify a potential issue with the brake rotors. These auditory cues are not merely a nuisance but also indicative of wear or damage necessitating prompt attention.
The Science Behind Brake Noise
Brake noise originates from the vibration of brake components. As brake pads deteriorate, they can induce the backing plate or other metallic parts to vibrate against the rotor, resulting in a squealing or squeaking sound. Understanding the source of the noise is crucial for diagnosing the issue correctly.

Distinguishing Between Pad and Rotor Noises
Distinguishing between noises attributed to worn-out brake pads and those resulting from damaged rotors is imperative. Brake pad noise typically manifests as a high-pitched squeal, whereas rotor damage may produce a grinding or growling sound. Accurate diagnosis is key to effective repair.
When Squealing Indicates Serious Rotor Damage
While squealing can be associated with worn brake pads, persistent or loud squealing can also indicate serious rotor damage, such as excessive wear or warping.
“Ignoring brake squeal can lead to more severe problems, including costly repairs down the line.”
Regular inspection is vital to prevent minor issues from becoming major problems.
| Cause | Symptoms | Solution |
|---|---|---|
| Worn Brake Pads | High-pitched squeal | Replace Brake Pads |
| Damaged Rotors | Grinding or Growling Noise | Resurface or Replace Rotors |
Sign #2: Grinding or Growling Sounds
The presence of grinding or growling sounds emanating from your vehicle’s brakes signifies a critical issue. These auditory cues are not mere annoyances; they herald potential hazards necessitating prompt investigation.
Metal-on-Metal Contact: What’s Happening Inside
Grinding or growling sounds during braking typically indicate metal-on-metal contact between the brake pads and rotors. This phenomenon occurs when brake pads are sufficiently worn, failing to cushion the rotor effectively, or when rotors are damaged or excessively worn.
The Progressive Nature of Grinding Noises
The grinding noise often manifests as a progressive issue, beginning with minor sounds that escalate in volume and persistence. Neglecting these initial indicators can precipitate more severe damage, including rotor warping or brake failure.
Immediate Steps to Take When You Hear Grinding
Upon detecting grinding or growling sounds, immediate action is imperative. First, inspect your brake pads for wear. If they are excessively worn, replacement is essential. Concurrently, examine your rotors for any signs of damage or excessive wear.
| Symptom | Possible Cause | Recommended Action |
|---|---|---|
| Grinding or Growling Sounds | Metal-on-Metal Contact | Inspect Brake Pads and Rotors |
| Progressive Noise Increase | Worn Brake Pads or Damaged Rotors | Replace Brake Pads; Resurface or Replace Rotors |
Regular maintenance and inspections can facilitate early identification of these issues, potentially averting more expensive repairs in the future.
Sign #3: Vibration in the Steering Wheel
A steering wheel that vibrates during braking is often a symptom of warped rotors. This vibration can be felt when you press the brake pedal, indicating a problem that needs immediate attention.
How Warped Rotors Transfer Vibration to the Steering
Warped rotors cause uneven braking, which leads to vibrations. These vibrations are transferred through the vehicle’s braking system to the steering wheel. The uneven surface of the warped rotor disrupts the smooth operation of the brake pads and calipers, resulting in a vibrating sensation.
Speed-Dependent Vibrations and What They Mean
The intensity of the vibration can vary with speed, becoming more pronounced at higher speeds. This speed dependency is a key indicator that the issue is related to the brake rotors. If the vibration is consistent across different speeds, it might indicate a more complex problem.
Measuring Rotor Runout with DIY Methods
To diagnose warped rotors, you can perform a simple DIY runout measurement. Using a dial indicator, you can measure the deviation of the rotor’s surface from its ideal plane. This involves attaching the dial indicator to a stable part of the vehicle and taking readings as you rotate the wheel. A significant deviation indicates warpage.
By understanding the causes of vibration in the steering wheel and using simple DIY methods to measure rotor runout, you can identify potential issues with your brake rotors early on, ensuring your vehicle’s safety and performance.
Sign #4: Visible Scoring or Grooves on Rotor Surface
Inspecting your brake rotors for visible scoring or grooves is crucial for maintaining safe braking performance. Visible scoring or grooves on the rotor surface can indicate wear and potential brake issues.
The presence of scoring or grooves doesn’t always signify a problem; understanding the difference between normal wear and problematic scoring is essential.
Normal Wear vs. Problematic Scoring
Normal wear on brake rotors can result in minor, uniform scoring. Deep or uneven grooves, on the other hand, can indicate a more serious issue that requires attention. Problematic scoring can lead to reduced braking efficiency and increased wear on other brake components.
Using a Straightedge to Check for Grooves
To inspect your rotors for grooves, use a straightedge to check for any deviations from a flat surface. Place the straightedge across the rotor surface, and measure any gaps between the straightedge and the rotor. This simple method can help identify uneven wear.
Measuring Groove Depth: When It’s Too Deep
Measuring the depth of grooves on your rotor surface is critical to determining if they are within acceptable limits. If the groove depth exceeds the manufacturer’s specifications, it may be necessary to resurface or replace the rotors.
| Groove Depth (mm) | Status | Recommended Action |
|---|---|---|
| 0 – 0.5 | Normal Wear | Monitor |
| 0.5 – 1.0 | Moderate Wear | Resurface |
| > 1.0 | Excessive Wear | Replace |
By understanding the condition of your brake rotors through regular inspections, you can ensure your vehicle’s braking system operates effectively and safely.
Sign #5: Blue Discoloration or Heat Spots
Blue discoloration or heat spots on brake rotors signify potential braking issues. These visual cues indicate that the rotors have been subjected to excessive heat. This can compromise their integrity and affect braking performance.
The Metallurgy Behind Heat Discoloration
Brake rotors exposed to high temperatures undergo metallurgical changes leading to discoloration. This heat discoloration often results from the rotor material being overheated, causing it to change color, typically turning blue or purple. This change is not merely cosmetic; it indicates that the rotor’s metallurgical structure may have been altered, potentially weakening it.
Identifying Heat Checking and Cracks
Excessive heat can cause heat checking, which are small cracks on the rotor’s surface. These cracks can propagate over time, leading to more significant problems if not addressed. Inspecting the rotors for these signs of heat damage is crucial for maintaining safe braking performance.
Driving Habits That Cause Rotor Overheating
Certain driving habits can significantly contribute to rotor overheating. Aggressive driving, such as rapid acceleration followed by hard braking, can generate excessive heat. Driving in hilly or mountainous terrain requires frequent braking, which can also lead to overheating. Being aware of these factors can help drivers take preventive measures to reduce the risk of rotor damage.
By understanding the causes and signs of blue discoloration or heat spots on brake rotors, drivers can take proactive steps to maintain their vehicle’s braking system. This ensures safety on the road.
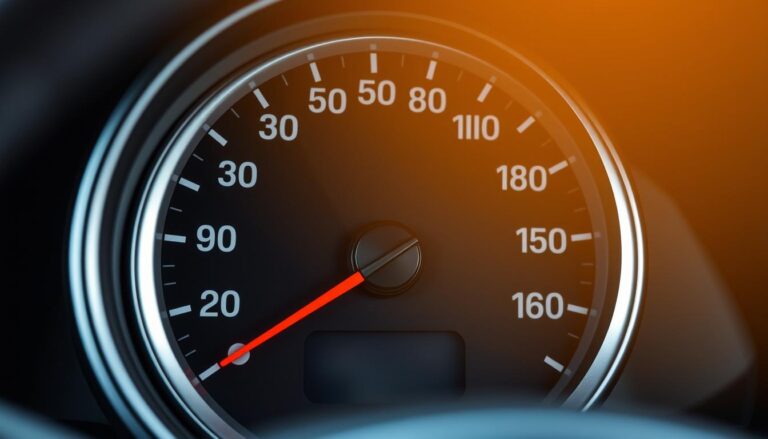
Sign #6: Increased Stopping Distance
A discernible elongation in the stopping distance of your vehicle heralds potential malfunctions within the braking apparatus. Such a phenomenon, where your vehicle’s deceleration is impeded, necessitates an examination of the braking system’s integrity.
The augmentation in stopping distance can stem from several causes, including the degradation of brake pads or the impairment of brake rotors. Accurate measurement of these alterations is imperative to gauge the gravity of the problem.
Quantifying Changes in Braking Performance
To evaluate the state of your brakes, precise measurement of your vehicle’s stopping distance is required. This can be achieved through a series of controlled brake tests.
| Speed (mph) | Normal Stopping Distance (feet) | Current Stopping Distance (feet) |
|---|---|---|
| 30 | 30-40 | 45 |
| 60 | 120-140 | 160 |
Safe Testing Methods for Brake Effectiveness
When conducting brake tests, it is crucial to do so in a secure environment, such as an empty parking lot, adhering to all safety protocols to prevent accidents.
Safe testing practices include:
- Ensuring the area is clear of obstacles and other vehicles
- Gradually increasing your speed before testing the brakes
- Having a spotter or assistant if possible
When Longer Stopping Distances Become Dangerous
An appreciable increase in stopping distance signifies a critical risk, notably in dense traffic or inclement weather. Immediate intervention is imperative to avert potential calamities.
Regular maintenance and inspections are vital to detect brake malfunctions before they escalate into hazardous situations.
Sign #7: Pulsating Brake Pedal
A pulsating brake pedal serves as a critical warning, signaling potential rotor wear or warping. This phenomenon, characterized by a vibrating sensation upon brake pedal application, necessitates immediate attention. It is a clear indicator of a mechanical issue that demands prompt resolution.
The Mechanical Cause of Pedal Pulsation
The root cause of a pulsating brake pedal often lies in the state of the brake rotors. Warped or excessively worn rotors can induce this vibration. Such conditions may arise from excessive heat, frequent heavy braking, or improper rotor installation.
Differentiating Rotor Issues from ABS Activation
Accurate diagnosis of a pulsating brake pedal requires distinguishing between rotor problems and Anti-lock Braking System (ABS) activation. ABS can mimic this sensation through its rapid cycling action. In contrast, rotor issues typically manifest as a more intense and consistent pulsation.
| Characteristics | Rotor Issues | ABS Activation |
|---|---|---|
| Pulsation Frequency | Consistent, related to rotor thickness variation | Rapid, due to ABS pumping action |
| Pulsation Severity | More pronounced, often accompanied by vibration | Less pronounced, typically uniform |
Measuring Pedal Pulsation Severity
To gauge the severity of pedal pulsation, a straightforward test can be conducted. Drive at a moderate pace and apply gentle to moderate brake pedal pressure. Observe the pulsation’s intensity and frequency. Severe or persistent pulsation warrants a professional inspection of the braking system.
By grasping the underlying causes of a pulsating brake pedal and distinguishing between rotor problems and ABS activation, drivers can proactively ensure their vehicle’s braking efficacy and safety.
Sign #8: Excessive Rust or Corrosion
Excessive rust or corrosion on brake rotors signifies a critical deterioration, posing significant safety risks if not addressed promptly. Given their metallic composition, rotors are inherently prone to corrosion, exacerbated by environmental factors.
Surface Rust vs. Structural Corrosion
Distinguishing between surface rust and structural corrosion is imperative. Surface rust, a superficial manifestation, can be eradicated through routine braking or simple cleaning. In contrast, structural corrosion invades the rotor’s core, potentially compromising its structural integrity.
Key differences between surface rust and structural corrosion:
- Surface rust is superficial and removable.
- Structural corrosion is severe, threatening rotor failure.
Regional Factors Affecting Rotor Lifespan
Geographical conditions significantly influence rotor corrosion rates. High humidity, coastal environments with saltwater exposure, and regions employing road salt during winter months expedite corrosion. Recognizing these regional influences aids in proactive measures to safeguard brake systems.
“The environment in which you drive has a significant impact on the longevity of your brake rotors. Being aware of these factors can help you take proactive steps to protect your vehicle’s braking system.”
Inspecting for Hidden Corrosion Between Surfaces
Inspecting for hidden corrosion between rotor surfaces and other brake components is essential. This entails removing the wheel for a visual examination of the rotors. Attention should be directed towards areas where components converge or overlap for signs of rust or corrosion.
Tips for inspecting hidden corrosion:
- Remove the wheel to access the rotor.
- Utilize a flashlight to illuminate hard-to-see areas.
- Inspect for rust or corrosion between the rotor and hub.
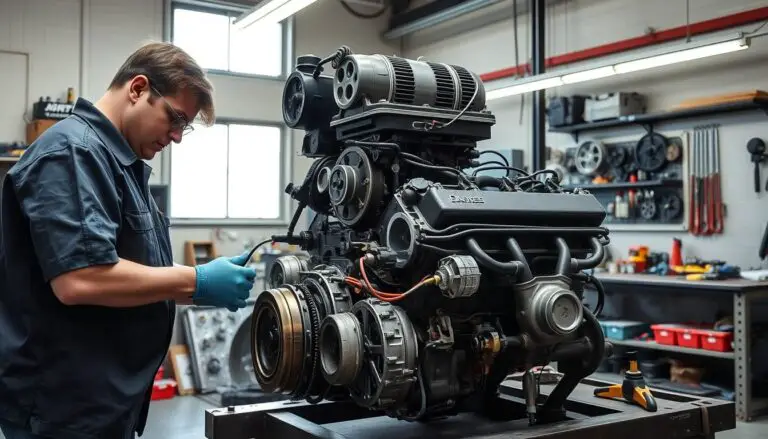
DIY Inspection Techniques for Brake Rotors
Conducting a home-based examination of your brake rotors can be a task of simplicity, provided you possess the requisite tools and possess an understanding of the criteria for inspection.
Tools Needed for Home Rotor Inspection
To execute a comprehensive DIY brake rotor inspection, a collection of indispensable tools is necessary. These include a caliper for the precise measurement of rotor thickness, a dial indicator to assess runout, and a straightedge for the detection of warping or uneven wear patterns.
Step-by-Step Visual Inspection Process
Initiate the process by removing the wheel to gain access to the rotor. Perform a visual examination of the rotor’s surface for indicators of wear, such as scoring, grooving, or excessive rust. Employ a caliper to measure the rotor’s thickness, comparing it to the manufacturer’s minimum specification.
| Inspection Step | What to Look For |
|---|---|
| Visual Inspection | Signs of wear, scoring, or rust |
| Thickness Measurement | Compare to manufacturer’s minimum spec |
| Runout Check | Use a dial indicator to measure runout |
When to Use a Dial Indicator for Precision
The dial indicator is indispensable for the precise measurement of rotor runout, a factor that can induce vibrations during braking. Should you encounter any unusual vibrations or pulsations, employ a dial indicator to measure the rotor’s runout. This will determine if resurfacing or replacement is necessary.
Resurfacing vs. Replacing: Making the Right Decision
The determination to resurface or replace brake rotors hinges on several pivotal factors, imperative for every vehicle proprietor to grasp. Confronted with rotors in disrepair, discerning the optimal strategy is paramount for upholding vehicular safety and operational efficacy.
Minimum Thickness Requirements for Safe Resurfacing
The thickness of brake rotors is a decisive factor in the resurfacing versus replacement conundrum. Manufacturers delineate a minimum threshold for rotor thickness, beyond which resurfacing is contraindicated. Resurfacing rotors that fall short of this threshold can compromise braking efficacy, potentially culminating in catastrophic failure. It is imperative to consult the vehicle’s manual or seek professional counsel to ascertain the minimum permissible thickness for your rotors.
Cost-Benefit Analysis of Repair Options
Assessing the cost-effectiveness of resurfacing versus replacement of brake rotors necessitates a thorough cost-benefit analysis. Resurfacing emerges as a viable option when rotors remain within the acceptable thickness range and exhibit minimal damage. Yet, if rotors are excessively worn, warped, or feature significant scoring, replacement may prove more economical in the long term. This is due to its guarantee of superior braking performance and enhanced safety.
| Repair Option | Cost | Benefits |
|---|---|---|
| Resurfacing | $50 – $100 per rotor | Cost-effective, maintains original rotor |
| Replacement | $200 – $500 per rotor | Ensures optimal performance, enhanced safety |
When Replacement Is the Only Safe Choice
In scenarios where rotors are severely worn, feature deep grooves, or exhibit warping, resurfacing is insufficient to restore their functionality. Overheating, manifesting as heat spots or cracks, necessitates replacement to avert brake failure. In these instances, the expense of replacement is offset by the augmented safety it affords.
In summation, the decision to resurface or replace brake rotors must be predicated on their state, the vehicle’s specifications, and a meticulous evaluation of the attendant costs and benefits.
Preventative Maintenance to Extend Rotor Life
Adopting a proactive stance towards brake rotor maintenance is paramount for enhancing vehicle safety and longevity. Implementing a few elementary practices can substantially diminish the wear and tear on your brake system.
Proper Breaking-In Procedures for New Rotors
Upon installation of new brake rotors, adherence to proper breaking-in protocols is imperative. This necessitates the avoidance of abrupt braking for the initial few hundred miles, allowing the new rotors and brake pads to harmonize effectively. Gradual braking facilitates the creation of an optimal friction interface, thus augmenting the overall performance and durability of the brake system.
Driving Habits That Preserve Brake Components
Your driving practices significantly influence the longevity of your brake rotors. Avoiding excessive speeding and hard braking can mitigate the strain on your brake system. Concurrently, maintaining a prudent following distance enables more gradual braking, thus reducing rotor wear.
Recommended Inspection Intervals by Vehicle Type
Consistent inspections are indispensable for the upkeep of your brake system. The interval for these inspections can fluctuate based on your vehicle’s type and operational intensity. For example, vehicles employed for heavy-duty purposes may necessitate more frequent assessments. Consult the table below for suggested inspection intervals.
| Vehicle Type | Inspection Interval (Miles) |
|---|---|
| Passenger Vehicles | 10,000 – 15,000 |
| Heavy-Duty Vehicles | 5,000 – 10,000 |
| High-Performance Vehicles | 5,000 – 7,500 |
By adhering to these directives and adopting a proactive stance towards brake maintenance, you can significantly prolong the life of your brake rotors. This ensures your vehicle remains both safe and dependable.
Conclusion
The significance of recognizing signs indicative of a malfunctioning rotor cannot be overstated, as it directly impacts vehicle safety. This article has elucidated eight critical indicators: the presence of squealing or squeaking noises, grinding or growling sounds, and vibration in the steering wheel. Other signs include visible scoring or grooves, blue discoloration or heat spots, an increase in stopping distance, a pulsating brake pedal, and excessive rust or corrosion. These symptoms collectively form a comprehensive framework for identifying rotor-related issues.
Adherence to a regimen of regular maintenance is paramount in prolonging the lifespan of brake rotors. By adopting appropriate braking practices and conducting routine inspections, vehicle owners can effectively mitigate premature wear. This proactive approach ensures that the braking system operates at its peak, thus enhancing overall driving safety. Promptly addressing rotor malfunctions is imperative to avert potential accidents.
In conclusion, the imperative of identifying rotor malfunctions and prioritizing their maintenance cannot be overstated. By doing so, drivers can guarantee that their vehicle’s braking system functions optimally, fostering a safer driving environment.
FAQ
What are the signs of a bad brake rotor?
Indicators of a malfunctioning brake rotor include audible squealing or squeaking, as well as grinding or growling sounds. Vibration in the steering wheel is another symptom, alongside visible scoring or grooves on the rotor’s surface. Blue discoloration or heat spots, an increase in stopping distance, and a pulsating brake pedal are also indicative. Excessive rust or corrosion further signals a problem.
How do I know if my brake rotors are warped?
Warped brake rotors manifest as vibrations in the steering wheel or brake pedal, typically occurring during braking at specific speeds. To confirm warping, utilize a dial indicator for rotor runout measurements.
Can I resurface my brake rotors or do they need to be replaced?
The decision to resurface or replace brake rotors hinges on their condition and minimum thickness. If rotors are excessively thin, replacement is imperative. Resurfacing is viable if they meet the manufacturer’s minimum thickness standards.
How often should I inspect my brake rotors?
Inspection frequency varies by vehicle type. Generally, brake rotors should be inspected every 10,000 to 15,000 miles, or during routine maintenance such as oil changes.
What causes brake rotors to overheat?
Brake rotors can overheat due to aggressive driving habits, including rapid braking, riding the brakes, or driving in hilly or mountainous terrain. Overheating can result in blue discoloration, heat checking, or cracking.
Are there any DIY methods for inspecting brake rotors?
Yes, visual inspection of brake rotors for wear, scoring, or corrosion is feasible. A straightedge can be employed to detect grooves, and a dial indicator can measure rotor runout for precise assessments.
How do driving habits affect brake rotor lifespan?
Driving habits significantly influence brake rotor lifespan. Aggressive driving, frequent city driving, or driving in hilly areas can shorten rotor lifespan. In contrast, cautious driving habits can extend it.
What is the difference between surface rust and structural corrosion on brake rotors?
Surface rust is superficial and generally harmless, whereas structural corrosion can compromise the rotor’s integrity and performance. It is essential to inspect for hidden corrosion between mating surfaces.
Can I prevent brake rotor issues through maintenance?
Yes, preventive maintenance such as regular inspections, proper breaking-in procedures for new rotors, and adopting driving habits that preserve brake components can extend brake rotor life and prevent issues.