Transforming your vehicle’s appearance can be a DIY endeavor with the right tools and techniques. Using a roller to paint your car is an efficient method that yields professional-looking results. This process allows you to refresh your car’s look without the high costs associated with professional painting services.
Our guide will walk you through the easy-to-follow steps and tips for achieving a smooth, even finish. From preparation to the final coat, we’ll cover the essential techniques for a successful DIY car painting project.
Key Takeaways
- Understand the benefits of using a roller for car painting
- Learn the preparation steps for a successful DIY project
- Discover techniques for achieving a smooth, even finish
- Explore tips for maintaining your newly painted car’s appearance
- Gain confidence in tackling your car painting project
Why Consider Roller Painting for Your Vehicle
Roller painting your vehicle can be a game-changer for those looking to refresh their car’s appearance without breaking the bank. This method offers several advantages, particularly for those on a budget or looking for a DIY solution.
Cost Benefits Compared to Professional Painting
One of the primary benefits of roller painting is its cost-effectiveness. By choosing to paint your car yourself with a roller, you can save significantly on labor costs compared to hiring a professional. The cost of materials, such as paint and rollers, is generally much lower than the overall cost of a professional paint job.
When Roller Painting is Appropriate
Roller painting is most suitable for vehicles that require a simple, uniform coat of paint, or for projects where the car’s surface is relatively smooth and even. It’s ideal for those looking to touch up or repaint older vehicles that are still in good condition but need a cosmetic refresh.
Realistic Expectations for Results
While roller painting can produce excellent results, it’s essential to have realistic expectations. The finish may not be as flawless as a professional paint job, but with proper preparation and technique, you can achieve a high-quality, durable coat that enhances your vehicle’s appearance.
| Aspect | Roller Painting | Professional Painting |
|---|---|---|
| Cost | Lower (DIY materials) | Higher (labor and materials) |
| Finish Quality | Good (with proper technique) | Excellent (professional finish) |
| Time Required | Variable (depending on DIY pace) | Faster (professional efficiency) |
Essential Materials and Tools Needed
Gathering the appropriate materials and tools is the first step towards a successful DIY car painting experience with a roller. Having the right equipment not only ensures a smoother process but also significantly impacts the quality of the finish.
Selecting the Right Roller and Covers
Choosing the correct roller and covers is crucial for achieving a smooth, even coat. For automotive painting, a roller with a synthetic fiber cover is recommended because it holds a lot of paint and applies it evenly. The nap length (thickness of the fibers) should be considered based on the texture of your car’s surface; a longer nap for rough surfaces and a shorter nap for smoother ones.

Automotive Paint Options
When it comes to automotive paint options, there are several types to consider, including acrylic enamel, acrylic lacquer, and water-based paints. Acrylic enamel is popular for DIY projects due to its durability and ease of application. It’s essential to choose a paint that is compatible with your car’s original paint and suitable for the climate you live in.
Additional Supplies Checklist
Beyond the roller and paint, several other supplies are necessary for a successful painting project. These include:
- Primer to prepare the surface
- Sanding tools for smoothing out the surface
- Masking tape and paper for protecting areas not to be painted
- A clean, well-ventilated workspace
- Protective gear such as gloves and a mask
Ensuring you have all these supplies on hand will make the process more efficient and help achieve a professional-looking finish.
Preparing Your Car for Roller Painting
Preparing your car for roller painting is a crucial step that ensures a smooth and successful painting process. Proper preparation helps in achieving a uniform finish and enhances the durability of the paint job.
Cleaning and Degreasing the Surface
The first step in preparing your car’s surface is to thoroughly clean and degrease it. Use a high-quality degreaser to remove dirt, grime, and wax. This step is crucial as it ensures that the paint adheres well to the surface.
Sanding Techniques for Smooth Application
Sanding is essential for a smooth paint application. Start with a coarse grit sandpaper (around 120-150 grit) to remove rust and old paint, then progress to finer grits (220-240 grit) for a smoother finish. Always sand in the direction of the metal to avoid scratches.
Masking and Protecting Areas Not to be Painted
Use masking tape and paper to cover areas you don’t want to paint, such as windows, trim, and moldings. Apply the tape carefully to ensure it is straight and smooth, pressing it down firmly to prevent paint seepage.
Setting Up Your Workspace
Set up your workspace in a well-ventilated area, free from dust and debris. Cover the floor and surrounding areas with drop cloths to protect them from paint spills. Ensure good lighting to help you identify any imperfections or areas that need more attention.

Painting a Car with a Roller: The Step-by-Step Process
With the right techniques and materials, painting your car with a roller can result in a smooth, even finish. This process involves several critical steps that, when followed correctly, can lead to a professional-looking outcome.
Applying Primer Correctly
Before applying paint, it’s essential to prime your car’s surface. Use a high-quality automotive primer and apply it evenly with a roller, ensuring coverage of all areas. Allow the primer to dry according to the manufacturer’s instructions.
Proper Rolling Techniques for Even Coverage
To achieve an even coat, use a roller with the appropriate nap length for your paint type. Work in sections, applying gentle to moderate pressure. Use a ‘W’ or ‘M’ pattern to ensure even distribution of paint.
Between-Coat Sanding Methods
Sanding between coats is crucial for a smooth finish. Use a fine-grit sandpaper to lightly sand the surface, removing any dust or minor imperfections. Clean the surface thoroughly before applying the next coat.
Applying Multiple Thin Coats
Instead of applying one thick coat, which can lead to drips and unevenness, apply multiple thin coats. Allow each coat to dry according to the manufacturer’s instructions before applying the next.
| Step | Description | Tips |
|---|---|---|
| 1. Primer Application | Apply primer evenly with a roller. | Ensure complete coverage and let dry. |
| 2. Rolling Techniques | Use a ‘W’ or ‘M’ pattern for even coverage. | Work in sections and apply gentle pressure. |
| 3. Between-Coat Sanding | Lightly sand with fine-grit sandpaper. | Remove dust and imperfections, clean thoroughly. |
| 4. Multiple Thin Coats | Apply thin coats, allowing each to dry. | Follow manufacturer’s drying time instructions. |
Drying and Curing Your Paint Job
Proper drying and curing are essential for a durable and long-lasting paint finish on your vehicle. After applying the final coat of paint, it’s crucial to create an environment that fosters optimal drying conditions.
Optimal Drying Conditions
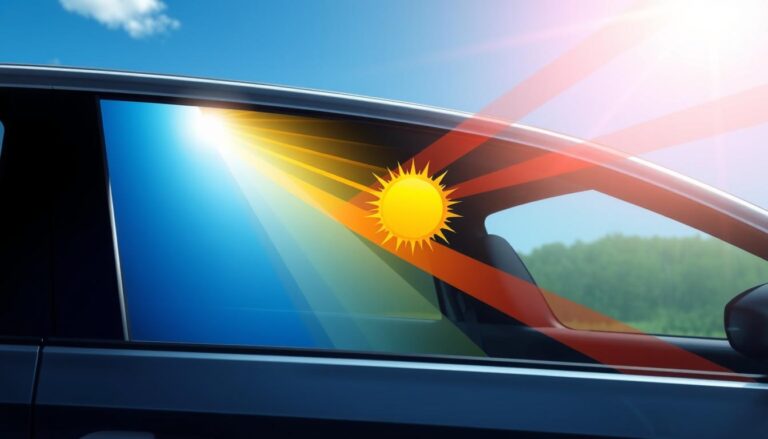
Optimal drying conditions involve a well-ventilated area with a consistent temperature between 60°F to 80°F (15°C to 27°C). Avoid direct sunlight, as it can cause the paint to dry too quickly, potentially leading to uneven finishes.
Drying Times Between Coats
The drying time between coats depends on the type of paint used and environmental conditions. Generally, it’s recommended to wait at least 30 minutes to an hour before applying the next coat. However, always refer to the manufacturer’s instructions for specific guidance.
Final Curing Period Before Handling
The final curing period is critical before handling your vehicle or exposing it to the elements. Allow the paint to cure for at least 24 hours before washing or waxing. For best results, consider waiting 48 to 72 hours before exposing your vehicle to harsh conditions.
Achieving a Professional-Looking Finish
The final stages of painting a car with a roller involve crucial steps that can make or break the professional quality of the finish. To achieve a showroom-quality appearance, it’s essential to focus on the details that matter most.
Wet Sanding After Painting
Wet sanding is a critical step that helps to smooth out the paint surface, removing minor imperfections and achieving a high-gloss finish. Using progressively finer grits of sandpaper, typically starting from 1200 grit and moving to 2000 or even 3000 grit, you can achieve a surface that’s ready for buffing.
Tip: Always sand in a wet environment to prevent scratching the surface, and ensure you’re wearing protective gear, including gloves and safety glasses.
Buffing and Polishing Techniques
After wet sanding, buffing and polishing are the next steps to enhance the finish. Using a dual-action polisher with the appropriate polishing compound can significantly improve the gloss and clarity of the paint.
“The key to a flawless finish lies in the patience and attention to detail during the buffing and polishing stages.” – Automotive Finishing Expert
Clear Coat Application Tips
Applying a clear coat is the final step in achieving a professional-looking finish. It’s crucial to follow the manufacturer’s instructions for application and drying times. Typically, applying thin coats and allowing adequate drying time between coats yields the best results.
| Clear Coat Type | Drying Time | Recommended Thickness |
|---|---|---|
| Standard | 30 minutes | 2-3 mils |
| High-Gloss | 1 hour | 3-4 mils |
Safety Considerations When Working with Automotive Paints
When working with automotive paints, safety should always be a top priority. Ensure you’re working in a well-ventilated area, and use protective gear, including a respirator, gloves, and safety glasses, to minimize exposure to harmful chemicals.
Mastering DIY Car Painting with a Roller
Painting a car with a roller can be a cost-effective and rewarding DIY project when done correctly. By following the tips and techniques outlined in this article, you can achieve a professional-looking finish without the hefty price tag.
A successful DIY car painting conclusion relies on careful preparation, the right materials, and a bit of patience. By selecting the right roller and covers, preparing your car’s surface, and applying primer and paint correctly, you can enjoy a smooth, even finish.
This roller painting summary highlights the importance of proper drying and curing times, as well as the final touches of wet sanding and buffing. With these steps, you can ensure a long-lasting and high-quality paint job that enhances your vehicle’s appearance.
By applying the knowledge gained from this article, you can confidently tackle your DIY car painting project and enjoy the satisfaction of a job well done.
FAQ
What type of roller is best for painting a car?
For painting a car, it’s recommended to use a high-quality, microfiber roller to achieve a smooth finish. The microfiber material helps to reduce the risk of roller marks and texture.
Can I use regular household paint on my car?
No, you should not use regular household paint on your car. Automotive paint is specifically designed to withstand the elements and last longer. It’s also formulated to adhere well to metal and other materials used in car manufacturing.
How do I prepare my car’s surface for roller painting?
To prepare your car’s surface, start by cleaning and degreasing the area. Then, sand the surface to create a smooth finish. Mask off any areas you don’t want to paint, and make sure the surface is dry and free of dust.
What is the ideal drying time between coats of paint?
The ideal drying time between coats of paint depends on the specific paint product and environmental conditions. Generally, it’s recommended to wait at least 30 minutes to an hour between coats, but always follow the manufacturer’s instructions.
How can I achieve a professional-looking finish with a roller?
To achieve a professional-looking finish, use a high-quality roller and paint, and follow the manufacturer’s instructions. Apply thin, even coats, and allow each coat to dry before applying the next. Wet sanding and buffing can also help to achieve a smooth, glossy finish.
Is it necessary to apply a clear coat after painting?
Yes, applying a clear coat is highly recommended to protect the paint and give it a glossy finish. Clear coat helps to shield the paint from the elements and can make the paint job last longer.
What safety precautions should I take when painting my car?
When painting your car, make sure to wear protective gear, including gloves, safety glasses, and a mask. Work in a well-ventilated area, and avoid painting in direct sunlight or high temperatures.
Can I paint my car with a roller if it has a textured or irregular surface?
While it’s possible to paint a car with a textured or irregular surface using a roller, the results may vary. For best results, consider using a spray gun or consulting a professional for complex or irregular surfaces.