Properly wiring a 7-pin trailer connector is crucial for safe and efficient towing. A well-installed connector ensures that your trailer’s lights, brakes, and other essential systems function correctly.
A trailer wiring guide can help you navigate the process, but it’s essential to understand the steps involved. In this article, we’ll provide a comprehensive wiring guide to help you wire your 7-pin trailer connector with confidence.
Key Takeaways
- Understand the importance of proper trailer wiring
- Learn the steps involved in wiring a 7-pin trailer connector
- Identify the key components of a trailer wiring system
- Discover how to troubleshoot common wiring issues
- Gain confidence in your ability to wire your trailer connector
Understanding 7-Pin Trailer Connectors
A 7-pin trailer connector is a standardized plug used for connecting the electrical systems of a vehicle to a trailer. This connector is crucial for ensuring that the trailer’s lights, brakes, and other electrical components function properly.
Types of 7-Pin Connectors in the US Market
In the US, there are primarily two types of 7-pin connectors used for trailer wiring: the RV-style and the commercial or heavy-duty style. The RV-style connector is commonly used for recreational vehicles and smaller trailers, while the commercial style is often used for larger, heavy-duty applications.

Function of Each Pin in the System
Each pin in the 7-pin connector serves a specific function:
– Pin 1: Left turn signal and brake light
– Pin 2: Reverse lights
– Pin 3: Ground
– Pin 4: Right turn signal and brake light
– Pin 5: Tail lights, clearance lights, and side markers
– Pin 6: Brake lights (auxiliary or additional brake light)
– Pin 7: Power for trailer brakes or auxiliary equipment
Standard Color Coding for Wiring
The standard color coding for trailer wiring helps in identifying the correct wires for connections. Common colors include:
– Red: Brake lights and turn signals
– Blue: Trailer brakes
– Green: Right turn signal and/or ground
– Yellow: Left turn signal
– Brown: Tail lights
– White or Black: Ground
Understanding these color codes is essential for proper wiring and to avoid electrical issues.
Tools and Materials Needed
The right tools and materials are crucial for successfully wiring your 7-pin trailer connector. Having everything you need within reach will make the process smoother and more efficient.
Essential Tools for Proper Wiring
To start, you’ll need a set of essential tools. These include:
- A wire stripper for removing insulation from wires
- A wire cutter for cutting wires to the correct length
- A crimping tool for securing connectors to wires
- A multimeter for testing electrical connections
Required Wires, Connectors, and Components
In addition to tools, you’ll need the following materials:
- A 7-pin trailer wiring harness
- Individual wires for brake, turn, and tail lights
- Connectors and sockets for the 7-pin plug
- Electrical tape or heat shrink tubing for insulation

Optional Testing Equipment
For added assurance, consider using:
- A circuit tester to verify electrical connections
- A voltage drop tester to check for voltage drops across connections
These tools and materials will help ensure that your 7-pin trailer connector is wired correctly and functions as expected.
Safety Precautions Before Starting
Ensuring your safety is paramount when working with electrical systems, such as wiring a 7-pin trailer connector. Electrical work can be hazardous if not done properly, so it’s essential to take the right precautions.
Electrical Safety Measures
Turn off the vehicle’s engine and disconnect the battery before starting work on the electrical system to prevent any accidental starts or electrical shocks. Use insulated tools to protect against short circuits.
Vehicle Preparation Steps
Ensure the vehicle is parked on a level surface and apply the parking brake. This will prevent any accidental movement during the wiring process. Check the vehicle’s manual for any specific instructions related to electrical system modifications.
Workspace Safety Considerations
Maintain a clean and organized workspace to avoid confusion and potential electrical hazards. Properly label and store wires and components to keep them from getting damaged or causing a short circuit.
7-Pin Trailer Wiring Diagrams Explained
7-pin trailer wiring diagrams serve as the blueprint for a safe and functional towing experience. These diagrams are essential for understanding how to connect your trailer to your vehicle properly.
Standard RV 7-Way Connector Diagram
The Standard RV 7-way connector diagram is a crucial reference for those installing or troubleshooting trailer wiring. It outlines the configuration of the 7-pin connector, which typically includes pins for tail lights, brake lights, turn signals, and auxiliary power.
Commercial 7-Way Connector Diagram
Commercial 7-way connector diagrams may vary slightly from the standard RV version, often incorporating additional features or different pin configurations for specific commercial applications.
Reading and Interpreting Wiring Schematics
Understanding how to read wiring schematics is vital for correctly wiring a trailer. These schematics provide a visual representation of the electrical circuit, making it easier to identify connections and potential issues.
Pin Identification Guide
A pin identification guide is a valuable tool when working with 7-pin trailer connectors. It helps users identify the function of each pin, ensuring that connections are made correctly.
Circuit Path Understanding
Circuit path understanding is critical for diagnosing and fixing electrical issues in trailer wiring. By tracing the circuit path, users can identify where a problem lies and take corrective action.
“A well-understood wiring diagram is the key to a smooth towing operation.”
Step-by-Step Wiring Process
Wiring a 7-pin trailer connector involves several critical steps that, when followed correctly, ensure a safe and functional towing experience. The process can be broken down into preparing the wiring harness, making vehicle-side and trailer-side connections, and securing all connections.
Preparing the Wiring Harness
The first step in wiring your 7-pin trailer connector is to prepare the wiring harness. This involves measuring and cutting the wires to the appropriate length.
Measuring and Cutting Wires
Measure the distance from the vehicle’s wiring system to the trailer connector and cut the wires accordingly. It’s essential to leave some extra length for slack.
Stripping and Preparing Wire Ends
Strip the insulation from the wire ends and prepare them for connection. Use a wire stripper to remove about 1/2 inch of insulation, and then twist the wires to prevent fraying.
Vehicle-Side Connection Process
The vehicle-side connection involves mounting the socket and connecting it to the vehicle’s wiring system.
Mounting the Socket
Mount the 7-pin socket to the vehicle’s rear, ensuring it’s securely fastened and protected from the elements. Use a socket with a weatherproof seal to prevent water ingress.
Connect the wiring harness to the vehicle’s wiring system, matching the colors and functions as indicated in the wiring diagram. Ensure all connections are secure and not loose.
Trailer-Side Connection Process
On the trailer side, you’ll need to install the plug and connect it to the trailer’s circuits.
Installing the Plug
Mount the 7-pin plug to the trailer, ensuring it’s securely attached. Use a plug that matches the socket on the vehicle side.
Connecting to Trailer Circuits
Connect the wiring harness to the trailer’s lighting and braking circuits. Double-check the connections to ensure they’re correct and secure.
Securing All Connections
To ensure the longevity and reliability of your wiring, it’s crucial to secure all connections properly.
Proper Crimping Techniques
Use proper crimping techniques to secure the wires to the connector pins. A good crimp should be tight and not come loose over time.
Weatherproofing Methods
Apply weatherproofing methods such as using silicone sealant or dielectric grease to protect the connections from moisture and corrosion.
“A well-sealed connection is key to a reliable wiring system.”
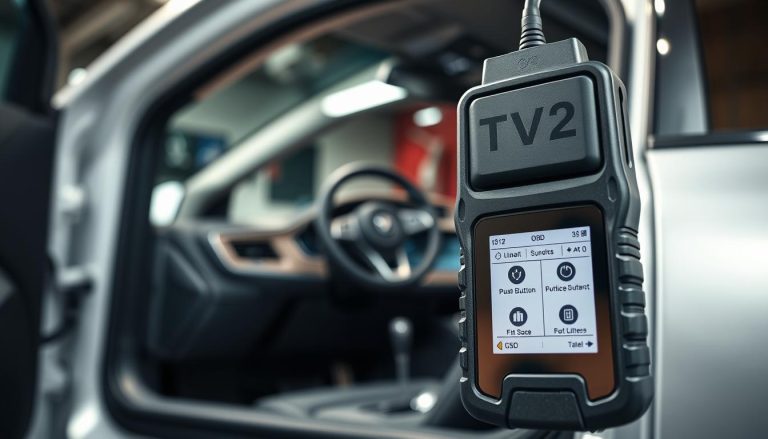
Testing Your Connections
To verify that your wiring job is done correctly, you’ll need to perform a series of tests on your connections. This step is crucial in ensuring that your trailer’s electrical system functions properly and safely.
Using a Multimeter and Circuit Tester
A multimeter is an essential tool for measuring voltage, resistance, and continuity in your wiring. Use it to check for any shorts or opens in the circuit. A circuit tester can also help identify issues by testing the continuity between different points in your wiring harness.
Functional Testing with the Vehicle
After verifying the wiring integrity, perform functional testing by turning on the vehicle’s headlights, brake lights, and turn signals. Check that these functions are working correctly on the trailer. This step helps ensure that the electrical connections are not only wired correctly but also functioning as intended.
Verifying Each Circuit Function
Verify that each circuit is functioning correctly by checking the corresponding lights on the trailer. For instance, when you turn on the vehicle’s turn signal, the trailer’s turn signal should also activate. This verification process ensures that all connections are correct and that there are no issues with the wiring.
Common Testing Issues and Solutions
Common issues during testing include incorrect wiring, loose connections, and blown fuses. If you encounter any problems, double-check your wiring diagram and connections. Ensure all connections are secure and not corroded. If a fuse is blown, identify the cause and replace it with a fuse of the correct amperage rating.
Troubleshooting Common Wiring Problems
Identifying and fixing wiring problems in 7-pin trailer connectors is crucial for maintaining the safety and functionality of your trailer. Wiring issues can lead to malfunctioning lights, brakes, and other critical systems.
Lighting Issues (Brake, Turn, Tail Lights)
Lighting issues are among the most common problems encountered with 7-pin trailer connectors. These can include brake lights that don’t illuminate, turn signals that malfunction, or tail lights that remain off. To troubleshoot, start by checking the wiring connections at both the vehicle and trailer ends. Ensure all connections are clean, dry, and securely fastened.
Electric Brake Controller Problems
Electric brake controllers can sometimes malfunction due to wiring issues. Check for any signs of wear or damage on the wiring leading to the brake controller. Verify that the controller is properly configured and that the gain is set correctly.
Intermittent Connection Diagnosis
Intermittent connections can be particularly challenging to diagnose. Use a multimeter to test for voltage drops across connections, which can indicate resistance or corrosion.
| Issue | Possible Cause | Solution |
|---|---|---|
| Lighting Issues | Corrosion or loose connections | Clean and secure connections |
| Electric Brake Controller Problems | Incorrect configuration or damaged wiring | Check configuration and inspect wiring |
| Intermittent Connections | Corrosion or wear on connectors | Test with multimeter and clean or replace connectors |
Cross-Wiring Identification and Fixes
Cross-wiring can lead to short circuits and malfunctioning systems. Carefully inspect the wiring harness for any signs of damage or misconnection.
Ground Connection Problems
A poor ground connection can cause a variety of issues, including malfunctioning lights and brakes. Ensure the ground wire is securely attached to a clean, metal surface.
Corrosion and Weather Damage Repair
Corrosion and weather damage can compromise the integrity of your wiring. Regularly inspect connections and wiring for signs of damage, and apply protective coatings as necessary.
Conclusion
Successfully wiring a 7-pin trailer connector requires attention to detail and adherence to the steps outlined in this guide. By understanding the types of 7-pin connectors, the function of each pin, and the standard color coding for wiring, you have laid the foundation for a reliable connection.
The process involves preparing the wiring harness, making vehicle-side and trailer-side connections, and securing all connections. Testing your connections using a multimeter and circuit tester ensures that each circuit functions as intended.
In summary, this guide has provided a comprehensive overview of the 7-pin trailer connector wiring process. By following these steps and considering the safety precautions and troubleshooting tips, you can achieve a successful trailer wiring conclusion.
A well-executed 7-pin trailer connector summary involves verifying each circuit’s function and addressing any issues that arise during testing. With this knowledge, you are now equipped to wire your 7-pin trailer connector with confidence.
FAQ
What is the purpose of a 7-pin trailer connector?
The 7-pin trailer connector is designed to provide a reliable and safe connection between a vehicle and a trailer, enabling the transfer of power for lighting, brakes, and other essential functions.
What are the different types of 7-pin connectors available in the US market?
The US market offers various types of 7-pin connectors, including the standard RV 7-way connector and commercial 7-way connector, each with its specific application and wiring configuration.
How do I identify the correct wires for connections when wiring a 7-pin trailer connector?
To identify the correct wires, refer to the standard color coding for wiring, which assigns specific colors to each pin function, ensuring that the correct wires are connected to the corresponding pins.
What tools and materials are required for wiring a 7-pin trailer connector?
The necessary tools and materials include essential wires, connectors, and components, as well as optional testing equipment such as a multimeter and circuit tester.
What safety precautions should I take before starting the wiring process?
Before starting, ensure you follow electrical safety measures, prepare the vehicle, and maintain a safe workspace to prevent electrical shocks, short circuits, or other hazards.
How do I read and interpret 7-pin trailer wiring diagrams?
To read and interpret wiring diagrams, understand the standard RV and commercial 7-way connector diagrams, and familiarize yourself with pin identification and circuit path understanding.
What are the common issues that may arise during the wiring process, and how can I troubleshoot them?
Common issues include lighting problems, electric brake controller issues, and intermittent connections; troubleshooting involves using a multimeter and circuit tester, verifying circuit functions, and addressing cross-wiring, ground connection problems, and corrosion or weather damage.
How do I test my 7-pin trailer connector connections to ensure they are correct and functional?
Use a multimeter and circuit tester to verify the connections, perform functional testing with the vehicle, and check each circuit function to ensure proper operation.
What are the benefits of proper crimping techniques and weatherproofing methods when securing connections?
Proper crimping techniques and weatherproofing methods ensure durable and reliable connections, protecting against corrosion, weather damage, and electrical issues.