Functioning taillights are a critical safety feature of any vehicle. They provide a clear indication of a vehicle’s intentions to other drivers, pedestrians, and cyclists, helping to prevent accidents. However, when taillights malfunction, it can lead to serious safety risks and potentially result in costly fines.
Understanding how to troubleshoot and repair taillight problems is essential for maintaining vehicle safety and avoiding potential hazards. This article will guide you through the common causes of taillight malfunctions and provide practical solutions for car taillight repair.
Key Takeaways
- Common causes of taillight malfunctions
- Step-by-step guide to taillight troubleshooting
- Practical solutions for car taillight repair
- Tips for maintaining taillight functionality
- Importance of functioning taillights for vehicle safety
Understanding Vehicle Taillight Systems
The taillight system of a vehicle is a critical safety feature that involves several key components. Understanding these components and how they work together is essential for effective troubleshooting and repair.
Basic Components of Taillight Assemblies
Taillight assemblies are made up of several basic components, including bulbs, sockets, housing, wiring, and connectors.
Bulbs, Sockets, and Housing
The bulbs are the light source, while the sockets provide a secure connection for the bulbs. The housing protects these components from environmental factors.
Wiring and Connectors
Wiring and connectors play a crucial role in supplying power to the taillights. Damaged wiring or faulty connectors can lead to taillight malfunctions. For more information on diagnosing wiring issues, you can visit this page.
How Taillight Circuits Function
Taillight circuits function by completing an electrical circuit that powers the bulbs. Understanding how these circuits work can help in diagnosing issues.
Types of Bulbs and Lighting Technologies
There are primarily two types of bulbs used in taillights: traditional incandescent bulbs and modern LED taillights.
Traditional Incandescent Bulbs
Incandescent bulbs are the traditional choice for taillights. They are relatively inexpensive but have a shorter lifespan compared to LEDs.
LED Taillights
LED taillights are becoming increasingly popular due to their longer lifespan and energy efficiency. They provide brighter light and are more durable.
| Feature | Incandescent Bulbs | LED Taillights |
|---|---|---|
| Lifespan | Shorter | Longer |
| Energy Efficiency | Less Efficient | More Efficient |
| Brightness | Less Bright | Brighter |

Taillights Not Working: Possible Causes and Effective Fixes
If your taillights are not functioning, it’s essential to identify the root cause, which could range from a burned-out bulb to a faulty wiring system. Understanding the potential causes and their fixes can save time and money.
Burned-Out Bulbs: Identification and Replacement
One of the most common reasons for taillight malfunction is a burned-out bulb. To identify if a bulb is burned out, inspect it visually for any signs of damage or discoloration. Replacing a taillight bulb is relatively straightforward and involves accessing the taillight assembly, removing the old bulb, and installing a new one.
Fuse Issues: Locating and Replacing Taillight Fuses
Fuse issues are another common cause of taillight failure. A blown fuse can occur due to electrical surges or shorts in the wiring. To address this, you need to locate your vehicle’s fuse box, identify the correct fuse related to the taillights, and replace it if necessary.
Finding Your Vehicle’s Fuse Box
The fuse box is typically located under the dashboard or in the engine compartment. Consult your vehicle’s owner’s manual for the exact location.
Identifying the Correct Fuse
Once you’ve located the fuse box, identify the fuse associated with the taillights by checking the fuse box diagram or labels.
Wiring Problems: Detecting and Repairing Damaged Wires
Wiring issues can cause taillight malfunctions due to damage or corrosion. Inspect the wiring for any signs of damage, such as cuts, frays, or rust. Repairing damaged wires involves cleaning or replacing the affected sections.

Socket Corrosion: Cleaning and Restoration Methods
Corrosion on the bulb socket can prevent proper contact and cause taillight failure. Cleaning the socket with a wire brush or replacing it if heavily corroded can resolve the issue.
Switch and Relay Failures
Failures in the taillight switch or relay can also cause malfunctions. Diagnosing these issues may require testing the switch or relay with a multimeter to check for proper function.
By systematically checking these potential causes, you can identify and fix the issue causing your taillights to malfunction.
Diagnosing Taillight Malfunctions
To effectively diagnose taillight issues, one must employ a combination of visual checks and advanced testing methods. This approach ensures that the root cause of the malfunction is identified accurately.
Visual Inspection Techniques
Visual inspections are the first step in diagnosing taillight malfunctions. This involves checking for visible damage and inspecting ground connections.
Checking for Visible Damage
Inspect the taillight assembly for any signs of physical damage, such as cracks or broken lenses. Check the bulbs for any visible defects.
Inspecting Ground Connections
Ensure that the ground connections are clean and secure. Corrosion or loose connections can cause taillight malfunctions.
Using a Multimeter for Circuit Testing
A multimeter is a valuable tool for diagnosing electrical issues in taillight circuits. It can be used for voltage testing at the socket and continuity testing of wires.
Voltage Testing at the Socket
Use a multimeter to check if the correct voltage is present at the taillight socket. This helps determine if the issue lies with the wiring or the bulb.
Continuity Testing of Wires
Check the continuity of wires leading to the taillight assembly. Damaged or broken wires can cause malfunctions.
| Diagnostic Test | Purpose | Indications |
|---|---|---|
| Voltage Testing | Check voltage at the socket | Identifies wiring or bulb issues |
| Continuity Testing | Check wire continuity | Identifies damaged or broken wires |
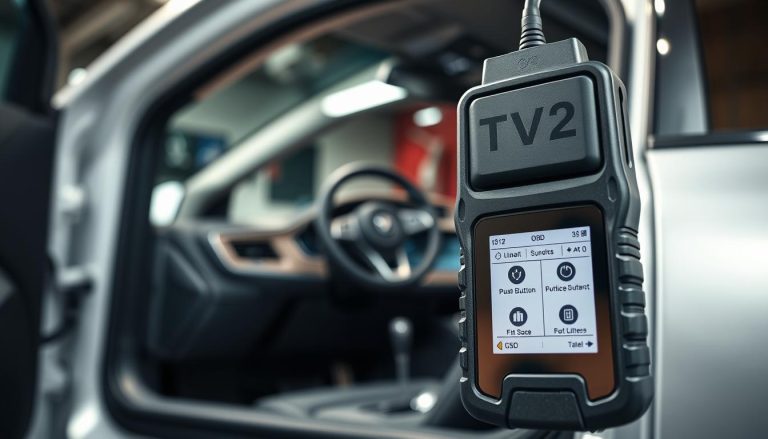
Common Diagnostic Error Codes
Modern vehicles often provide diagnostic error codes that can help identify taillight malfunctions. Understanding these codes is crucial for accurate diagnosis.
When to Use Professional Diagnostic Tools
While many taillight issues can be diagnosed with basic tools, complex problems may require professional diagnostic equipment. Knowing when to seek professional help is important.
Step-by-Step Taillight Repair Guide
Whether you’re dealing with a burned-out bulb or a more complex wiring issue, this guide will walk you through the process of repairing your vehicle’s taillights. The steps outlined below are designed to be straightforward and easy to follow, ensuring that you can get your taillights functioning properly without unnecessary hassle.
Safety Precautions Before Starting Repairs
Before diving into any repairs, it’s crucial to take the necessary safety precautions to avoid injury or further damage to your vehicle.
Disconnecting the Battery
Start by disconnecting the battery to prevent any accidental starts or electrical shocks. This step is essential for ensuring your safety while working on the electrical components of your vehicle.
Working in a Safe Environment
Ensure you’re working in a well-ventilated area, away from any open flames or sparks. This will help prevent any potential fires or explosions.
Accessing Taillight Assemblies in Different Vehicle Types
The method for accessing taillight assemblies can vary significantly depending on the type of vehicle you own.
Sedan and Coupe Access Methods
For sedans and coupes, taillight assemblies are often accessed from within the trunk. You’ll typically need to remove a panel or screws to gain access.
SUV and Truck Considerations
SUVs and trucks may have taillight assemblies that are accessed from outside, sometimes requiring the removal of a wheel or other exterior components.
Bulb Replacement Procedure
Replacing a taillight bulb is one of the most common repairs. Ensure you purchase a bulb that matches the specifications of your vehicle’s original bulb.
Wiring Repair Techniques
When dealing with wiring issues, it’s essential to identify the problem accurately.
Splicing and Soldering
Splicing and soldering are common techniques used to repair damaged wires. Ensure any connections are secure and insulated properly.
Using Heat Shrink Tubing
Heat shrink tubing can be used to protect and insulate wire repairs, providing a durable and long-lasting fix.
Testing After Repairs
After completing any repairs, it’s crucial to test your taillights to ensure they’re functioning correctly. Turn on your headlights and check each taillight for proper operation.
Preventing Future Taillight Problems
Preventing taillight malfunctions requires a proactive approach to vehicle maintenance. By understanding the common causes of taillight failures and taking steps to mitigate them, you can ensure your vehicle’s taillights continue to function properly.
Regular Maintenance Schedule
Establishing a regular maintenance schedule is key to preventing taillight issues. This includes checking taillight bulbs for signs of wear, inspecting wiring for damage, and ensuring that taillight assemblies are clean and free of debris.
Weather Protection for Taillight Assemblies
Weather conditions can significantly impact taillight functionality. Protecting taillight assemblies from the elements is crucial.
Sealing Against Moisture
Moisture can seep into taillight assemblies, causing corrosion and damage. Ensuring that taillight seals are intact can prevent this issue.
Preventing Condensation
Condensation within taillight assemblies can lead to reduced visibility and functionality. Using desiccants or ensuring proper ventilation can help prevent condensation.
Upgrading to LED Technology: Pros and Cons
Upgrading to LED taillights can offer several benefits, including increased durability and energy efficiency. However, it’s essential to consider the potential drawbacks, such as higher upfront costs and potential compatibility issues.
Legal Requirements for Taillights in the United States
Understanding the legal requirements for taillights in the U.S. is crucial for ensuring compliance. Regulations regarding taillight color, brightness, and functionality can vary by state.
DIY vs. Professional Repairs: When to Seek Help
While some taillight repairs can be done DIY, more complex issues may require professional assistance. Knowing when to seek help can save time and ensure that repairs are done correctly.
Conclusion
Properly functioning taillights are crucial for vehicle safety and compliance with legal requirements in the United States. This article has provided a comprehensive guide to troubleshooting and repairing taillight problems, covering causes, diagnoses, and repair techniques.
A taillight troubleshooting summary reveals that common issues include burned-out bulbs, fuse problems, wiring damage, and socket corrosion. By understanding these potential causes, vehicle owners can effectively diagnose and repair taillight malfunctions.
To ensure taillights are functioning correctly, it’s essential to apply the knowledge gained from this guide. Regular maintenance, including checking and replacing bulbs, inspecting wiring, and protecting taillight assemblies from weather conditions, can prevent future problems.
In conclusion, a well-maintained taillight system is vital for safe driving. By following the steps outlined in this article, vehicle owners can achieve a successful taillight repair conclusion, ensuring their vehicle’s taillights are functioning properly and safely.
FAQ
What are the most common causes of taillight malfunctions?
The most common causes include burned-out bulbs, fuse issues, wiring problems, socket corrosion, and switch or relay failures.
How do I check if a taillight bulb is burned out?
To check, inspect the bulb visually for signs of damage or darkness. You can also use a multimeter to test for continuity.
What is the proper way to replace a taillight bulb?
First, ensure the vehicle is turned off and the taillight assembly is accessible. Then, remove the bulb socket, replace the bulb with a new one of the same type, and reassemble.
How do I locate the fuse box in my vehicle?
Consult your vehicle’s owner’s manual or look for a label on the fuse box cover. The fuse box is typically located under the dashboard or in the engine compartment.
What is the difference between incandescent and LED taillights?
Incandescent bulbs use a filament that can burn out, while LED taillights use light-emitting diodes that are more durable and energy-efficient.
Can I upgrade my vehicle’s taillights to LED?
Yes, but ensure the new LED taillights are compatible with your vehicle’s electrical system and comply with local regulations.
How do I diagnose a wiring problem in my taillight circuit?
Use a multimeter to test for voltage at the socket and continuity of the wires. Inspect the wiring for signs of damage or corrosion.
What are the benefits of using a multimeter for circuit testing?
A multimeter allows you to accurately diagnose electrical issues, such as voltage drops or continuity problems, helping you identify the root cause of taillight malfunctions.
How often should I inspect my vehicle’s taillights?
Regularly inspect your taillights as part of your vehicle’s maintenance schedule, ideally during oil changes or every few months.
Are there any legal requirements for taillights in the United States?
Yes, taillights must be functional, visible from a certain distance, and comply with specific regulations regarding color and intensity, which vary by state.